注意: 着急的读者可以直接跳到这里快速开始。
若在使用 Kubebuilder v1? 请查看 legacy documentation。
文档适合哪些人看
Kubernetes 的使用者
Kubernetes 的使用者将通过学习其 APIs 是如何设计和实现的,从而更深入地了解 Kubernetes 。这本书将教读者如何开发自己的 Kubernetes APIs 以及如何设计核心 Kubernetes API 的原理。
包括:
- Kubernetes APIs 和 Resources 的构造
- APIs 版本控制语义
- 故障自愈
- 垃圾回收和 Finalizers
- 声明式与命令式 APIs
- 基于 Level-Based 与 Edge-Base APIs
- Resources 与 Subresources
Kubernetes API 开发者
API 扩展开发者将学习实现标准的 Kubernetes API 原理和概念,以及用于快速执行的简单工具和库。这本书涵盖了开发人员通常会遇到的陷阱和误区。
包括:
- 如何用一个 reconciliation 方法处理多个 events
- 如何配置定期执行 reconciliation 方法
- 即将到来的
- 何时使用 lister cache 与 live lookups
- 垃圾回收与 Finalizers
- 如何使用 Declarative 与 Webhook Validation
- 如何实现 API 版本控制
贡献
如果您想为本书或代码做出贡献,请先阅读我们的贡献准则。
资源
- 代码仓库:sigs.k8s.io/kubebuilder
- Slack 沟通群:#kubebuilder
- Google Group:[email protected]
- 云原生社区:https://cloudnative.to
快速入门
快速入门包含如下内容:
依赖组件
- go version v1.15+.
- docker version 17.03+.
- kubectl version v1.11.3+.
- kustomize v3.1.0+
- 能够访问 Kubernetes v1.11.3+ 集群
安装
安装 kubebuilder:
os=$(go env GOOS)
arch=$(go env GOARCH)

# 下载 kubebuilder 并解压到 tmp 目录中
curl -L https://go.kubebuilder.io/dl/2.3.1/${os}/${arch} | tar -xz -C /tmp/
If you are using a Kubebuilder plugin version less than version v3+, you must configure the Kubernetes binaries required for the envtest, run:
# 将 kubebuilder 移动到一个长期的路径,并将其加入环境变量 path 中
# (如果你把 kubebuilder 放在别的地方,你需要额外设置 KUBEBUILDER_ASSETS 环境变量)

sudo mv /tmp/kubebuilder_2.3.1_${os}_${arch} /usr/local/kubebuilder
export PATH=$PATH:/usr/local/kubebuilder/bin
Kubebuilder 通过 kubebuilder completion <bash|zsh> 命令为 Bash 和 Zsh 提供了自动完成的支持,这可以节省你大量的重复编码工作。更多信息请参见 completion 文档。
创建一个项目
创建一个目录,然后在里面运行 kubebuilder init 命令,初始化一个新项目。示例如下。
mkdir $GOPATH/src/example
cd $GOPATH/src/example
kubebuilder init --domain my.domain
创建一个 API
运行下面的命令,创建一个新的 API(组/版本)为 “webapp/v1”,并在上面创建新的 Kind(CRD) “Guestbook”。
kubebuilder create api --group webapp --version v1 --kind Guestbook
可选项: 编辑 API 定义和对账业务逻辑。更多信息请参见 设计一个 API 和 控制器。
示例 `(api/v1/guestbook_types.go)`
// GuestbookSpec defines the desired state of Guestbook
type GuestbookSpec struct {
	// INSERT ADDITIONAL SPEC FIELDS - desired state of cluster
	// Important: Run "make" to regenerate code after modifying this file

	// Quantity of instances
	// +kubebuilder:validation:Minimum=1
	// +kubebuilder:validation:Maximum=10
	Size int32 `json:"size"`

	// Name of the ConfigMap for GuestbookSpec's configuration
	// +kubebuilder:validation:MaxLength=15
	// +kubebuilder:validation:MinLength=1
	ConfigMapName string `json:"configMapName"`

	// +kubebuilder:validation:Enum=Phone;Address;Name
	Type string `json:"alias,omitempty"`
}

// GuestbookStatus defines the observed state of Guestbook
type GuestbookStatus struct {
	// INSERT ADDITIONAL STATUS FIELD - define observed state of cluster
	// Important: Run "make" to regenerate code after modifying this file

	// PodName of the active Guestbook node.
	Active string `json:"active"`

	// PodNames of the standby Guestbook nodes.
	Standby []string `json:"standby"`
}

// +kubebuilder:object:root=true
// +kubebuilder:subresource:status
// +kubebuilder:resource:scope=Cluster

// Guestbook is the Schema for the guestbooks API
type Guestbook struct {
	metav1.TypeMeta   `json:",inline"`
	metav1.ObjectMeta `json:"metadata,omitempty"`

	Spec   GuestbookSpec   `json:"spec,omitempty"`
	Status GuestbookStatus `json:"status,omitempty"`
}
测试
你需要一个 Kubernetes 集群来运行。 你可以使用 KIND 来获取一个本地集群进行测试,也可以在远程集群上运行。
将 CRD 安装到集群中
make install
运行控制器(这将在前台运行,如果你想让它一直运行,请切换到新的终端)。
make run
安装 CR 实例
如果你按了 y 创建资源 [y/n],那么你就为示例中的自定义资源定义 CRD 创建了一个自定义资源 CR (如果你更改了 API 定义,请务必先编辑它们)。
kubectl apply -f config/samples/
如何在集群中运行
构建并推送你的镜像到 IMG 指定的位置。
make docker-build docker-push IMG=<some-registry>/<project-name>:tag
根据 IMG 指定的镜像将控制器部署到集群中。
make deploy IMG=<some-registry>/<project-name>:tag
卸载 CRD
从你的集群中删除 CRD
make uninstall
卸载控制器
从集群中卸载控制器
make undeploy
下一步
现在,参照 CronJob 教程,通过开发一个演示示例项目更好地理解 kubebuilder 的工作原理。
教程:构建 CronJob
太多的教程一开始都是以一些非常复杂的设置开始,或者是实现一些玩具应用,让你了解了基本的知识,然后又在更复杂的东西上停滞不前。相反地,本教程将会带你了解 Kubebuilder 的(几乎)全部复杂功能,从简单的功能开始,到全部功能。
让我们假装厌倦了 Kubernetes 中的 CronJob 控制器的非 Kubebuilder 实现繁重的维护工作(当然,这有点小题大做),我们想用 KubeBuilder 来重写它。
CronJob 控制器的工作是定期在 Kubernetes 集群上运行一次性任务。它是以 Job 控制器为基础实现的,而 Job 控制器的任务是运行一次性的任务,确保它们完成。
与其试图一开始解决重写 Job 控制器的问题,我们先看看如何与外部类型进行交互。
创建项目
正如 快速入门 中所介绍的那样,我们需要创建一个新的项目。确保你已经 安装 Kubebuilder,然后再创建一个新项目。
# 我们将使用 tutorial.kubebuilder.io 域,
# 所以所有的 API 组将是<group>.tutorial.kubebuilder.io.
kubebuilder init --domain tutorial.kubebuilder.io
现在我们已经创建了一个项目,让我们来看看 Kubebuilder 为我们初始化了哪些组件。....
一个 kubebuilder 项目有哪些组件?
当自动生成一个新项目时,Kubebuilder 为我们提供了一些基本的模板。
创建基础组件
首先是基本的项目文件初始化,为项目构建做好准备。
`go.mod`: 我们的项目的 Go mod 配置文件,记录依赖库信息。
module tutorial.kubebuilder.io/project

go 1.15

require (
	github.com/go-logr/logr v0.1.0
	github.com/onsi/ginkgo v1.12.1
	github.com/onsi/gomega v1.10.1
	github.com/robfig/cron v1.2.0
	k8s.io/api v0.18.6
	k8s.io/apimachinery v0.18.6
	k8s.io/client-go v0.18.6
	sigs.k8s.io/controller-runtime v0.6.2
)
`Makefile`: 用于控制器构建和部署的 Makefile 文件
# Image URL to use all building/pushing image targets
IMG ?= controller:latest
# Produce CRDs that work back to Kubernetes 1.11 (no version conversion)
CRD_OPTIONS ?= "crd:trivialVersions=true"

# Get the currently used golang install path (in GOPATH/bin, unless GOBIN is set)
ifeq (,$(shell go env GOBIN))
GOBIN=$(shell go env GOPATH)/bin
else
GOBIN=$(shell go env GOBIN)
endif

all: manager

# Run tests
ENVTEST_ASSETS_DIR=$(shell pwd)/testbin
test: generate fmt vet manifests
	mkdir -p ${ENVTEST_ASSETS_DIR}
	test -f ${ENVTEST_ASSETS_DIR}/setup-envtest.sh || curl -sSLo ${ENVTEST_ASSETS_DIR}/setup-envtest.sh https://raw.githubusercontent.com/kubernetes-sigs/controller-runtime/master/hack/setup-envtest.sh
	source ${ENVTEST_ASSETS_DIR}/setup-envtest.sh; fetch_envtest_tools $(ENVTEST_ASSETS_DIR); setup_envtest_env $(ENVTEST_ASSETS_DIR); go test ./... -coverprofile cover.out

# Build manager binary
manager: generate fmt vet
	go build -o bin/manager main.go

# Run against the configured Kubernetes cluster in ~/.kube/config
run: generate fmt vet manifests
	go run ./main.go

# Install CRDs into a cluster
install: manifests kustomize
	$(KUSTOMIZE) build config/crd | kubectl apply -f -

# Uninstall CRDs from a cluster
uninstall: manifests kustomize
	$(KUSTOMIZE) build config/crd | kubectl delete -f -

# Deploy controller in the configured Kubernetes cluster in ~/.kube/config
deploy: manifests kustomize
	cd config/manager && $(KUSTOMIZE) edit set image controller=${IMG}
	$(KUSTOMIZE) build config/default | kubectl apply -f -

# UnDeploy controller from the configured Kubernetes cluster in ~/.kube/config
undeploy:
	$(KUSTOMIZE) build config/default | kubectl delete -f -

# Generate manifests e.g. CRD, RBAC etc.
manifests: controller-gen
	$(CONTROLLER_GEN) $(CRD_OPTIONS) rbac:roleName=manager-role webhook paths="./..." output:crd:artifacts:config=config/crd/bases

# Run go fmt against code
fmt:
	go fmt ./...

# Run go vet against code
vet:
	go vet ./...

# Generate code
generate: controller-gen
	$(CONTROLLER_GEN) object:headerFile="hack/boilerplate.go.txt" paths="./..."

# Build the docker image
docker-build: test
	docker build . -t ${IMG}

# Push the docker image
docker-push:
	docker push ${IMG}

# find or download controller-gen
# download controller-gen if necessary
controller-gen:
ifeq (, $(shell which controller-gen))
	@{ \
	set -e ;\
	CONTROLLER_GEN_TMP_DIR=$$(mktemp -d) ;\
	cd $$CONTROLLER_GEN_TMP_DIR ;\
	go mod init tmp ;\
	go get sigs.k8s.io/controller-tools/cmd/[email protected] ;\
	rm -rf $$CONTROLLER_GEN_TMP_DIR ;\
	}
CONTROLLER_GEN=$(GOBIN)/controller-gen
else
CONTROLLER_GEN=$(shell which controller-gen)
endif

kustomize:
ifeq (, $(shell which kustomize))
	@{ \
	set -e ;\
	KUSTOMIZE_GEN_TMP_DIR=$$(mktemp -d) ;\
	cd $$KUSTOMIZE_GEN_TMP_DIR ;\
	go mod init tmp ;\
	go get sigs.k8s.io/kustomize/kustomize/[email protected] ;\
	rm -rf $$KUSTOMIZE_GEN_TMP_DIR ;\
	}
KUSTOMIZE=$(GOBIN)/kustomize
else
KUSTOMIZE=$(shell which kustomize)
endif
`PROJECT`: 用于生成组件的 Kubebuilder 元数据
domain: tutorial.kubebuilder.io
layout: go.kubebuilder.io/v3-alpha
projectName: project
repo: tutorial.kubebuilder.io/project
resources:
- group: batch
  kind: CronJob
  version: v1
version: 3-alpha
启动配置
我们还可以在 config/ 目录下获得启动配置。现在,它只包含了在集群上启动控制器所需的 Kustomize YAML 定义,但一旦我们开始编写控制器,它还将包含我们的 CustomResourceDefinitions(CRD) 、RBAC 配置和 WebhookConfigurations 。
config/default 在标准配置中包含 Kustomize base ,它用于启动控制器。
其他每个目录都包含一个不同的配置,重构为自己的基础。
-
config/manager: 在集群中以 pod 的形式启动控制器 -
config/rbac: 在自己的账户下运行控制器所需的权限
入口函数
最后,当然也是最重要的一点,生成项目的入口函数:main.go。接下来我们看看它。.....
每段旅程需要一个起点,每个程序需要一个入口函数
Apache License
Licensed under the Apache License, Version 2.0 (the “License”); you may not use this file except in compliance with the License. You may obtain a copy of the License at
http://www.apache.org/licenses/LICENSE-2.0
Unless required by applicable law or agreed to in writing, software distributed under the License is distributed on an “AS IS” BASIS, WITHOUT WARRANTIES OR CONDITIONS OF ANY KIND, either express or implied. See the License for the specific language governing permissions and limitations under the License.
我们的 main 文件最开始是 import 一些基本库,尤其是:
- 核心的 控制器运行时 库
- 默认的控制器运行时日志库-- Zap (后续会对它作更多的介绍)
package main

import (
	"flag"
	"fmt"
	"os"

	"k8s.io/apimachinery/pkg/runtime"
	_ "k8s.io/client-go/plugin/pkg/client/auth/gcp"
	ctrl "sigs.k8s.io/controller-runtime"
	"sigs.k8s.io/controller-runtime/pkg/cache"
	"sigs.k8s.io/controller-runtime/pkg/log/zap"
	// +kubebuilder:scaffold:imports
)
每一组控制器都需要一个 Scheme,它提供了 Kinds 和相应的 Go 类型之间的映射。我们将在编写 API 定义的时候再谈一谈 Kinds,所以现在只需要记住它就好。
var (
	scheme   = runtime.NewScheme()
	setupLog = ctrl.Log.WithName("setup")
)

func init() {

	// +kubebuilder:scaffold:scheme
}
这段代码的核心逻辑比较简单:
- 我们通过 flag 库解析入参
- 我们实例化了一个manager,它记录着我们所有控制器的运行情况,以及设置共享缓存和API服务器的客户端(注意,我们把我们的 Scheme 的信息告诉了 manager)。
- 运行 manager,它反过来运行我们所有的控制器和 webhooks。manager 状态被设置为 Running,直到它收到一个优雅停机 (graceful shutdown) 信号。这样一来,当我们在 Kubernetes 上运行时,我们就可以优雅地停止 pod。
虽然我们现在还没有任何业务代码可供执行,但请记住 +kubebuilder:scaffold:builder 的注释 --- 事情很快就会变得有趣起来。
func main() {
	var metricsAddr string
	flag.StringVar(&metricsAddr, "metrics-addr", ":8080", "The address the metric endpoint binds to.")
	flag.Parse()

	ctrl.SetLogger(zap.New(zap.UseDevMode(true)))

	mgr, err := ctrl.NewManager(ctrl.GetConfigOrDie(), ctrl.Options{Scheme: scheme, MetricsBindAddress: metricsAddr})
	if err != nil {
		setupLog.Error(err, "unable to start manager")
		os.Exit(1)
	}
注意:Manager 可以通过以下方式限制控制器可以监听资源的命名空间。
	mgr, err = ctrl.NewManager(ctrl.GetConfigOrDie(), ctrl.Options{
		Scheme:             scheme,
		Namespace:          namespace,
		MetricsBindAddress: metricsAddr,
	})
上面的例子将把你的项目改成只监听单一的命名空间。在这种情况下,建议通过将默认的 ClusterRole 和 ClusterRoleBinding 分别替换为 Role 和 RoleBinding 来限制所提供给这个命名空间的授权。
另外,也可以使用 MultiNamespacedCacheBuilder 来监听特定的命名空间。
	var namespaces []string // List of Namespaces

	mgr, err = ctrl.NewManager(ctrl.GetConfigOrDie(), ctrl.Options{
		Scheme:             scheme,
		NewCache:           cache.MultiNamespacedCacheBuilder(namespaces),
		MetricsBindAddress: fmt.Sprintf("%s:%d", metricsHost, metricsPort),
	})
更多信息请参见 MultiNamespacedCacheBuilder
	// +kubebuilder:scaffold:builder

	setupLog.Info("starting manager")
	if err := mgr.Start(ctrl.SetupSignalHandler()); err != nil {
		setupLog.Error(err, "problem running manager")
		os.Exit(1)
	}
}
说完这些,我们就可以开始创建我们的 API 了!
GVK 介绍
在我们开始讲 API 之前,我们应该先介绍一下 Kubernetes 中 API 相关的术语。
当我们在 Kubernetes 中谈论 API 时,我们经常会使用 4 个术语:groups 、versions、kinds 和 resources。
组和版本
Kubernetes 中的 API 组简单来说就是相关功能的集合。每个组都有一个或多个版本,顾名思义,它允许我们随着时间的推移改变 API 的职责。
类型和资源
每个 API 组-版本包含一个或多个 API 类型,我们称之为 Kinds。虽然一个 Kind 可以在不同版本之间改变表单内容,但每个表单必须能够以某种方式存储其他表单的所有数据(我们可以将数据存储在字段中,或者在注释中)。 这意味着,使用旧的 API 版本不会导致新的数据丢失或损坏。更多 API 信息,请参阅 Kubernetes API 指南。
你也会偶尔听到提到 resources。 resources(资源) 只是 API 中的一个 Kind 的使用方式。通常情况下,Kind 和 resources 之间有一个一对一的映射。 例如,pods 资源对应于 Pod 种类。但是有时,同一类型可能由多个资源返回。例如,Scale Kind 是由所有 scale 子资源返回的,如 deployments/scale 或 replicasets/scale。这就是允许 Kubernetes HorizontalPodAutoscaler(HPA) 与不同资源交互的原因。然而,使用 CRD,每个 Kind 都将对应一个 resources。
注意:resources 总是用小写,按照惯例是 Kind 的小写形式。
GVK = Group Version Kind GVR = Group Version Resources
那么,这些术语如何对应到 Golang 中的实现呢?
当我们在一个特定的群组版本 (Group-Version) 中提到一个 Kind 时,我们会把它称为 GroupVersionKind,简称 GVK。与 资源 (resources) 和 GVR 一样,我们很快就会看到,每个 GVK 对应 Golang 代码中的到对应生成代码中的 Go type。
现在我们理解了这些术语,我们就可以真正地创建我们的 API!
Scheme 是什么?
我们之前看到的 Scheme 是一种追踪 Go Type 的方法,它对应于给定的 GVK(不要被它吓倒 godocs)。
例如,假设我们将 "tutorial.kubebuilder.io/api/v1".CronJob{} 类型放置在 batch.tutorial.kubebuilder.io/v1 API 组中(也就是说它有 CronJob Kind)。
然后,我们便可以在 API server 给定的 json 数据构造一个新的 &CronJob{}。
{
    "kind": "CronJob",
    "apiVersion": "batch.tutorial.kubebuilder.io/v1",
    ...
}
或当我们在一次变更中去更新或提交 &CronJob{} 时,查找正确的组版本。
创建一个 API
搭建一个新的 Kind (你刚在 上一章节 中注意到的,是吗?) 和相应的控制器,我们可以用 kubebuilder create api:
kubebuilder create api --group batch --version v1 --kind CronJob
当第一次我们为每个组-版本调用这个命令的时候,它将会为新的组-版本创建一个目录。
在本案例中,创建了一个对应于batch.tutorial.kubebuilder.io/v1(记得我们在开始时 --domain 的设置吗?) 的 api/v1/ 目录。
它也为我们的CronJob Kind 添加了一个文件,api/v1/cronjob_types.go。每次当我们用不同的 kind 去调用这个命令,它将添加一个相应的新文件。
让我们来看看我们得到了哪些东西,然后我们就可以开始去填写了。
Apache License
Licensed under the Apache License, Version 2.0 (the “License”); you may not use this file except in compliance with the License. You may obtain a copy of the License at
http://www.apache.org/licenses/LICENSE-2.0
Unless required by applicable law or agreed to in writing, software distributed under the License is distributed on an “AS IS” BASIS, WITHOUT WARRANTIES OR CONDITIONS OF ANY KIND, either express or implied. See the License for the specific language governing permissions and limitations under the License.
我们非常简单地开始:我们导入meta/v1 API 组,通常本身并不会暴露该组,而是包含所有 Kubernetes 种类共有的元数据。
package v1

import (
	metav1 "k8s.io/apimachinery/pkg/apis/meta/v1"
)
下一步,我们为种类的 Spe c和 Status 定义类型。Kubernetes 功能通过使期待的状态(Spec)和实际集群状态(其他对象的
Status)保持一致和外部状态,然后记录观察到的状态(Status)。
因此,每个 functional 对象包括 spec 和 status 。很少的类型,像 ConfigMap 不需要遵从这个模式,因为它们不编码期待的状态,
但是大部分类型需要做这一步。
// 编辑这个文件!这是你拥有的脚手架!
// 注意: json 标签是必需的。为了能够序列化字段,任何你添加的新的字段一定有json标签。

// CronJobSpec 定义了 CronJob 期待的状态
type CronJobSpec struct {
	// 插入额外的 SPEC 字段 - 集群期待的状态
	// 重要:修改了这个文件之后运行"make"去重新生成代码
}

// CronJobStatus 定义了 CronJob 观察的的状态
type CronJobStatus struct {
	// 插入额外的 STATUS 字段 - 定义集群观察的状态
	// 重要:修改了这个文件之后运行"make"去重新生成代码
}
下一步,我们定义与实际种类相对应的类型,CronJob 和 CronJobList 。
CronJob 是一个根类型, 它描述了 CronJob 种类。像所有 Kubernetes 对象,它包含
TypeMeta (描述了API版本和种类),也包含其中拥有像名称,名称空间和标签的东西的 ObjectMeta 。
CronJobList 只是多个 CronJob 的容器。它是批量操作中使用的种类,像 LIST 。
通常情况下,我们从不修改任何一个 -- 所有修改都要到 Spec 或者 Status 。
那个小小的 +kubebuilder:object:root 注释被称为标记。我们将会看到更多的它们,但要知道它们充当额外的元数据,
告诉controller-tools(我们的代码和YAML生成器)额外的信息。
这个特定的标签告诉 object 生成器这个类型表示一个种类。然后,object 生成器为我们生成
这个所有表示种类的类型一定要实现的runtime.Object接口的实现。
// +kubebuilder:object:root=true
// +kubebuilder:subresource:status
// CronJob 是 cronjobs API 的 Schema
type CronJob struct {
	metav1.TypeMeta   `json:",inline"`
	metav1.ObjectMeta `json:"metadata,omitempty"`

	Spec   CronJobSpec   `json:"spec,omitempty"`
	Status CronJobStatus `json:"status,omitempty"`
}

// +kubebuilder:object:root=true
// CronJobList 包含了一个 CronJob 的列表
type CronJobList struct {
	metav1.TypeMeta `json:",inline"`
	metav1.ListMeta `json:"metadata,omitempty"`
	Items           []CronJob `json:"items"`
}
最后,我们将这个 Go 类型添加到 API 组中。这允许我们将这个 API 组中的类型可以添加到任何Scheme。
func init() {
	SchemeBuilder.Register(&CronJob{}, &CronJobList{})
}
现在我们已经看到了基本的结构了,让我们开始去填写它吧!
设计一个 API
在 Kubernetes 中,我们对如何设计 API 有一些原则。也就是说,所有序列化的字段必须是 驼峰式 ,所以我们使用的 JSON 标签需要遵循该格式。我们也可以使用omitempty 标签来标记一个字段在空的时候应该在序列化的时候省略。
字段可以使用大多数的基本类型。数字是个例外:出于 API 兼容性的目的,我们只允许三种数字类型。对于整数,需要使用 int32 和 int64 类型;对于小数,使用 resource.Quantity 类型。
等等,什么是 `resource.Quantity`?
Quantity 是十进制数的一种特殊符号,它有一个明确固定的表示方式,使它们在不同的机器上更具可移植性。 你可能在 Kubernetes 中指定资源请求和对 pods 的限制时已经注意到它们。
它们在概念上的工作原理类似于浮点数:它们有一个 significand、基数和指数。它们的序列化和人类可读格式使用整数和后缀来指定值,就像我们描述计算机存储的方式一样。
例如,值 2m 在十进制符号中表示 0.002。 2Ki 在十进制中表示 2048 ,而 2K 在十进制中表示 2000。 如果我们要指定分数,我们就换成一个后缀,让我们使用一个整数:2.5 就是 2500m。
有两个支持的基数:10 和 2(分别称为十进制和二进制)。十进制基数用 “普通的” SI 后缀表示(如 M 和 K ),而二进制基数用 “mebi” 符号表示(如 Mi 和 Ki )。 对比 megabytes vs mebibytes。
还有一个我们使用的特殊类型:metav1.Time。 它有一个稳定的、可移植的序列化格式的功能,其他与 time.Time 相同。
说完了这些,让我们来看看我们的 CronJob 对象是什么样子的吧!
Apache License
Copyright 2020 The Kubernetes authors.
Licensed under the Apache License, Version 2.0 (the “License”); you may not use this file except in compliance with the License. You may obtain a copy of the License at
http://www.apache.org/licenses/LICENSE-2.0
Unless required by applicable law or agreed to in writing, software distributed under the License is distributed on an “AS IS” BASIS, WITHOUT WARRANTIES OR CONDITIONS OF ANY KIND, either express or implied. See the License for the specific language governing permissions and limitations under the License.
package v1
Imports
import (
	batchv1beta1 "k8s.io/api/batch/v1beta1"
	corev1 "k8s.io/api/core/v1"
	metav1 "k8s.io/apimachinery/pkg/apis/meta/v1"
)

// EDIT THIS FILE!  THIS IS SCAFFOLDING FOR YOU TO OWN!
// NOTE: json tags are required.  Any new fields you add must have json tags for the fields to be serialized.
首先,让我们来看看 spec。正如我们之前讨论过的,spec 代表所期望的状态,所以控制器的任何 “输入” 都会在这里。
通常来说,CronJob 由以下几部分组成:
- 一个时间表( CronJob 中的 cron )
- 要运行的 Job 模板( CronJob 中的 Job )
当然 CronJob 还需要一些额外的东西,使得它更加易用
- 一个已经启动的 Job 的超时时间(如果该 Job 执行超时,那么我们会将在下次调度的时候重新执行该 Job)。
- 如果多个 Job 同时运行,该怎么办(我们要等待吗?还是停止旧的 Job ?)
- 暂停 CronJob 运行的方法,以防出现问题。
- 对旧 Job 历史的限制
请记住,由于我们从不读取自己的状态,我们需要有一些其他的方法来跟踪一个 Job 是否已经运行。我们可以使用至少一个旧的 Job 来做这件事。
我们将使用几个标记(// +comment)来指定额外的元数据。在生成 CRD 清单时,controller-tools 将使用这些数据。我们稍后将看到,controller-tools 也将使用 GoDoc 来生成字段的描述。
// CronJobSpec defines the desired state of CronJob
type CronJobSpec struct {
	// +kubebuilder:validation:MinLength=0

	// The schedule in Cron format, see https://en.wikipedia.org/wiki/Cron.
	Schedule string `json:"schedule"`

	// +kubebuilder:validation:Minimum=0

	// Optional deadline in seconds for starting the job if it misses scheduled
	// time for any reason.  Missed jobs executions will be counted as failed ones.
	// +optional
	StartingDeadlineSeconds *int64 `json:"startingDeadlineSeconds,omitempty"`

	// Specifies how to treat concurrent executions of a Job.
	// Valid values are:
	// - "Allow" (default): allows CronJobs to run concurrently;
	// - "Forbid": forbids concurrent runs, skipping next run if previous run hasn't finished yet;
	// - "Replace": cancels currently running job and replaces it with a new one
	// +optional
	ConcurrencyPolicy ConcurrencyPolicy `json:"concurrencyPolicy,omitempty"`

	// This flag tells the controller to suspend subsequent executions, it does
	// not apply to already started executions.  Defaults to false.
	// +optional
	Suspend *bool `json:"suspend,omitempty"`

	// Specifies the job that will be created when executing a CronJob.
	JobTemplate batchv1beta1.JobTemplateSpec `json:"jobTemplate"`

	// +kubebuilder:validation:Minimum=0

	// The number of successful finished jobs to retain.
	// This is a pointer to distinguish between explicit zero and not specified.
	// +optional
	SuccessfulJobsHistoryLimit *int32 `json:"successfulJobsHistoryLimit,omitempty"`

	// +kubebuilder:validation:Minimum=0

	// The number of failed finished jobs to retain.
	// This is a pointer to distinguish between explicit zero and not specified.
	// +optional
	FailedJobsHistoryLimit *int32 `json:"failedJobsHistoryLimit,omitempty"`
}
我们定义了一个自定义类型来保存我们的并发策略。实际上,它的底层类型是 string,但该类型给出了额外的文档,并允许我们在类型上附加验证,而不是在字段上验证,使验证逻辑更容易复用。
// ConcurrencyPolicy describes how the job will be handled.
// Only one of the following concurrent policies may be specified.
// If none of the following policies is specified, the default one
// is AllowConcurrent.
// +kubebuilder:validation:Enum=Allow;Forbid;Replace
type ConcurrencyPolicy string

const (
	// AllowConcurrent allows CronJobs to run concurrently.
	AllowConcurrent ConcurrencyPolicy = "Allow"

	// ForbidConcurrent forbids concurrent runs, skipping next run if previous
	// hasn't finished yet.
	ForbidConcurrent ConcurrencyPolicy = "Forbid"

	// ReplaceConcurrent cancels currently running job and replaces it with a new one.
	ReplaceConcurrent ConcurrencyPolicy = "Replace"
)
接下来,让我们设计一下我们的 status,它表示实际看到的状态。它包含了我们希望用户或其他控制器能够轻松获得的任何信息。
我们将保存一个正在运行的 Jobs,以及我们最后一次成功运行 Job 的时间。注意,我们使用 metav1.Time 而不是 time.Time 来保证序列化的兼容性以及稳定性,如上所述。
// CronJobStatus defines the observed state of CronJob
type CronJobStatus struct {
	// INSERT ADDITIONAL STATUS FIELD - define observed state of cluster
	// Important: Run "make" to regenerate code after modifying this file

	// A list of pointers to currently running jobs.
	// +optional
	Active []corev1.ObjectReference `json:"active,omitempty"`

	// Information when was the last time the job was successfully scheduled.
	// +optional
	LastScheduleTime *metav1.Time `json:"lastScheduleTime,omitempty"`
}
最后,CronJob 和 CronJobList 直接使用模板生成的即可。如前所述,我们不需要改变这个,除了标记我们想要一个有状态子资源,这样我们的行为就像内置的 kubernetes 类型。
// +kubebuilder:object:root=true
// +kubebuilder:subresource:status

// CronJob is the Schema for the cronjobs API
type CronJob struct {
Root Object Definitions
	metav1.TypeMeta   `json:",inline"`
	metav1.ObjectMeta `json:"metadata,omitempty"`

	Spec   CronJobSpec   `json:"spec,omitempty"`
	Status CronJobStatus `json:"status,omitempty"`
}

// +kubebuilder:object:root=true

// CronJobList contains a list of CronJob
type CronJobList struct {
	metav1.TypeMeta `json:",inline"`
	metav1.ListMeta `json:"metadata,omitempty"`
	Items           []CronJob `json:"items"`
}

func init() {
	SchemeBuilder.Register(&CronJob{}, &CronJobList{})
}
现在我们定义好了一个 API,我们需要编写一个控制器来实际实现这些功能。
简要说明: 剩下文件的作用?
如果你在 api/v1/ 目录下看到了其他文件,
你可能会注意到除了 cronjob_types.go 这个文件外,还有两个文件:groupversion_info.go 和 zz_generated.deepcopy.go。
虽然这些文件都不需要编辑(前者保持原样,而后者是自动生成的),但是如果知道这些文件的内容,那么将是非常有用的。
groupversion_info.go
groupversion_info.go 包含了关于 group-version 的一些元数据:
Apache License
Copyright 2020 The Kubernetes authors.
Licensed under the Apache License, Version 2.0 (the “License”); you may not use this file except in compliance with the License. You may obtain a copy of the License at
http://www.apache.org/licenses/LICENSE-2.0
Unless required by applicable law or agreed to in writing, software distributed under the License is distributed on an “AS IS” BASIS, WITHOUT WARRANTIES OR CONDITIONS OF ANY KIND, either express or implied. See the License for the specific language governing permissions and limitations under the License.
首先,我们有一些包级别的标记的标记,表示存在这个包中的 Kubernetes 对象,并且这个包表示 batch.tutorial.kubebuilder.io 组。object 生成器使用前者,而后者是由 CRD 生成器来生成的,它会从这个包创建 CRD 的元数据。
// 包 v1 包含了 batch v1 API 这个组的 API Schema 定义。
// +kubebuilder:object:generate=true
// +groupName=batch.tutorial.kubebuilder.io
package v1

import (
	"k8s.io/apimachinery/pkg/runtime/schema"
	"sigs.k8s.io/controller-runtime/pkg/scheme"
)
然后,我们有一些常见且常用的变量来帮助我们设置我们的 Scheme 。因为我们需要在这个包的 controller 中用到所有的类型,
用一个方便的方法给其他 Scheme 来添加所有的类型,是非常有用的(而且也是一种惯例)。SchemeBuilder 能够帮助我们轻松的实现这个事情。
var (
	// GroupVersion 是用来注册这些对象的 group version。
	GroupVersion = schema.GroupVersion{Group: "batch.tutorial.kubebuilder.io", Version: "v1"}

	// SchemeBuilder 被用来给 GroupVersionKind scheme 添加 go 类型。
	SchemeBuilder = &scheme.Builder{GroupVersion: GroupVersion}

	// AddToScheme 将 group-version 中的类型添加到指定的 scheme 中。
	AddToScheme = SchemeBuilder.AddToScheme
)
zz_generated.deepcopy.go
zz_generated.deepcopy.go 包含了前述 runtime.Object 接口的自动实现,这些实现标记了代表 Kinds 的所有根类型。
runtime.Object 接口的核心是一个深拷贝方法,即 DeepCopyObject。
controller-tools 中的 object 生成器也能够为每一个根类型以及其子类型生成另外两个易用的方法:DeepCopy 和
DeepCopyInto。
控制器简介
控制器是 Kubernetes 的核心,也是任何 operator 的核心。
控制器的工作是确保对于任何给定的对象,世界的实际状态(包括集群状态,以及潜在的外部状态,如 Kubelet 的运行容器或云提供商的负载均衡器)与对象中的期望状态相匹配。每个控制器专注于一个根 Kind,但可能会与其他 Kind 交互。
我们把这个过程称为 reconciling。
在 controller-runtime 中,为特定种类实现 reconciling 的逻辑被称为 Reconciler。 Reconciler 接受一个对象的名称,并返回我们是否需要再次尝试(例如在错误或周期性控制器的情况下,如 HorizontalPodAutoscaler)。
Apache License
Licensed under the Apache License, Version 2.0 (the “License”); you may not use this file except in compliance with the License. You may obtain a copy of the License at
http://www.apache.org/licenses/LICENSE-2.0
Unless required by applicable law or agreed to in writing, software distributed under the License is distributed on an “AS IS” BASIS, WITHOUT WARRANTIES OR CONDITIONS OF ANY KIND, either express or implied. See the License for the specific language governing permissions and limitations under the License.
首先,我们从一些标准的 import 开始。和之前一样,我们需要核心 controller-runtime 运行库,以及 client 包和我们的 API 类型包。
package controllers

import (
	"context"

	"github.com/go-logr/logr"
	"k8s.io/apimachinery/pkg/runtime"
	ctrl "sigs.k8s.io/controller-runtime"
	"sigs.k8s.io/controller-runtime/pkg/client"

	batchv1 "tutorial.kubebuilder.io/project/api/v1"
)
接下来,kubebuilder 为我们搭建了一个基本的 reconciler 结构。几乎每一个调节器都需要记录日志,并且能够获取对象,所以可以直接使用。
// CronJobReconciler reconciles a CronJob object
type CronJobReconciler struct {
	client.Client
	Log    logr.Logger
	Scheme *runtime.Scheme
}
Most controllers eventually end up running on the cluster, so they need RBAC permissions, which we specify using controller-tools RBAC markers. These are the bare minimum permissions needed to run. As we add more functionality, we’ll need to revisit these.
// +kubebuilder:rbac:groups=batch.tutorial.kubebuilder.io,resources=cronjobs,verbs=get;list;watch;create;update;patch;delete
// +kubebuilder:rbac:groups=batch.tutorial.kubebuilder.io,resources=cronjobs/status,verbs=get;update;patch
Reconcile 实际上是对单个对象进行调谐。我们的 Request 只是有一个名字,但我们可以使用 client 从缓存中获取这个对象。
我们返回一个空的结果,没有错误,这就向 controller-runtime 表明我们已经成功地对这个对象进行了调谐,在有一些变化之前不需要再尝试调谐。
大多数控制器需要一个日志句柄和一个上下文,所以我们在 Reconcile 中将他们初始化。
上下文是用来允许取消请求的,也或者是实现 tracing 等功能。它是所有 client 方法的第一个参数。Background 上下文只是一个基本的上下文,没有任何额外的数据或超时时间限制。
控制器-runtime通过一个名为logr的库使用结构化的日志记录。正如我们稍后将看到的,日志记录的工作原理是将键值对附加到静态消息中。我们可以在我们的调和方法的顶部预先分配一些对,让这些对附加到这个调和器的所有日志行。
controller-runtime 通过一个名为 logr 日志库使用结构化的记录日志。正如我们稍后将看到的,日志记录的工作原理是将键值对附加到静态消息中。我们可以在我们的 Reconcile 方法的顶部预先分配一些配对信息,将他们加入这个 Reconcile 的所有日志中。
func (r *CronJobReconciler) Reconcile(req ctrl.Request) (ctrl.Result, error) {
	_ = context.Background()
	_ = r.Log.WithValues("cronjob", req.NamespacedName)

	// your logic here

	return ctrl.Result{}, nil
}
最后,我们将 Reconcile 添加到 manager 中,这样当 manager 启动时它就会被启动。
现在,我们只是注意到这个 Reconcile 是在 CronJobs 上运行的。以后,我们也会用这个来标记其他的对象。
func (r *CronJobReconciler) SetupWithManager(mgr ctrl.Manager) error {
	return ctrl.NewControllerManagedBy(mgr).
		For(&batchv1.CronJob{}).
		Complete(r)
}
现在我们已经了解了 Reconcile 的基本结构,我们来补充一下 CronJobs 的逻辑。
实现一个控制器
CronJob 控制器的基本逻辑如下:
-
根据名称加载定时任务
-
列出所有有效的 job,更新其状态
-
根据保留的历史版本数清理版本过旧的 job
-
检查当前 CronJob 是否被挂起(如果被挂起,则不执行任何操作)
-
计算 job 下一个定时执行时间
-
如果 job 符合执行时机,没有超出截止时间,且不被并发策略阻塞,执行该 job
-
当任务进入运行状态或到了下一次执行时间, job 重新排队
Apache License
Copyright 2020 The Kubernetes authors.
Licensed under the Apache License, Version 2.0 (the “License”); you may not use this file except in compliance with the License. You may obtain a copy of the License at
http://www.apache.org/licenses/LICENSE-2.0
Unless required by applicable law or agreed to in writing, software distributed under the License is distributed on an “AS IS” BASIS, WITHOUT WARRANTIES OR CONDITIONS OF ANY KIND, either express or implied. See the License for the specific language governing permissions and limitations under the License.
开始编码之前,先引进基本的依赖。除此之外还需要一些额外的依赖库,在使用到它们时,我们再详细介绍。
package controllers

import (
	"context"
	"fmt"
	"sort"
	"time"

	"github.com/go-logr/logr"
	"github.com/robfig/cron"
	kbatch "k8s.io/api/batch/v1"
	corev1 "k8s.io/api/core/v1"
	metav1 "k8s.io/apimachinery/pkg/apis/meta/v1"
	"k8s.io/apimachinery/pkg/runtime"
	ref "k8s.io/client-go/tools/reference"
	ctrl "sigs.k8s.io/controller-runtime"
	"sigs.k8s.io/controller-runtime/pkg/client"

	batch "tutorial.kubebuilder.io/project/api/v1"
)
接下来,我们需要一个时钟好让我们在测试中模拟计时。
// CronJob 调谐器对 CronJob 对象进行调谐
type CronJobReconciler struct {
	client.Client
	Log    logr.Logger
	Scheme *runtime.Scheme
	Clock
}
Clock
我们虚拟了一个时钟以便在测试中方便地来回调节时间,
调用time.Now获取真实时间
type realClock struct{}

func (_ realClock) Now() time.Time { return time.Now() }

// clock接口可以获取当前的时间
// 可以帮助我们在测试中模拟计时
type Clock interface {
	Now() time.Time
}
注意,我们需要获得RBAC权限——我们需要一些额外权限去 创建和管理job,添加如下一些字段
// +kubebuilder:rbac:groups=batch.tutorial.kubebuilder.io,resources=cronjobs,verbs=get;list;watch;create;update;patch;delete
// +kubebuilder:rbac:groups=batch.tutorial.kubebuilder.io,resources=cronjobs/status,verbs=get;update;patch
// +kubebuilder:rbac:groups=batch,resources=jobs,verbs=get;list;watch;create;update;patch;delete
// +kubebuilder:rbac:groups=batch,resources=jobs/status,verbs=get
控制器的核心部分——调谐逻辑
var (
	scheduledTimeAnnotation = "batch.tutorial.kubebuilder.io/scheduled-at"
)

func (r *CronJobReconciler) Reconcile(req ctrl.Request) (ctrl.Result, error) {
	ctx := context.Background()
	log := r.Log.WithValues("cronjob", req.NamespacedName)
1: 根据名称加载定时任务
通过 client 获取定时任务。所有 client 方法第一个参数都是 context(用于取消定时任务)作为
第一个参数,把请求对象信息作为最后一个参数。Get 方法例外,它把
NamespacedName
作为中间的第二个参数(大多数方法都没有中间的NamespacedName参数,下文会提到)
许多client方法的最后一个参数接受变长参数。
	var cronJob batch.CronJob
	if err := r.Get(ctx, req.NamespacedName, &cronJob); err != nil {
		log.Error(err, "unable to fetch CronJob")
		//忽略掉 not-found 错误,它们不能通过重新排队修复(要等待新的通知)
		//在删除一个不存在的对象时,可能会报这个错误。
		return ctrl.Result{}, client.IgnoreNotFound(err)
	}
2: 列出所有有效 job,更新它们的状态
为确保每个 job 的状态都会被更新到,我们需要列出某个 CronJob 在当前命名空间下的所有 job。 和 Get 方法类似,我们可以使用 List 方法来列出 CronJob 下所有的 job。注意,我们使用变长参数 来映射命名空间和任意多个匹配变量(实际上相当于是建立了一个索引)。
	var childJobs kbatch.JobList
	if err := r.List(ctx, &childJobs, client.InNamespace(req.Namespace), client.MatchingFields{jobOwnerKey: req.Name}); err != nil {
		log.Error(err, "unable to list child Jobs")
		return ctrl.Result{}, err
	}
查找到所有的 job 后,将其归类为 active,successful,failed 三种类型,同时持续跟踪其 最新的执行情况以更新其状态。牢记,status 值应该是从实际的运行状态中实时获取。从 cronjob 中读取 job 的状态通常不是一个好做法。应该从每次执行状态中获取。我们后续也采用这种方法。
我们可以检查一个 job 是否已处于 “finished” 状态,使用 status 条件还可以知道它是 succeeded 或 failed 状态。
	// 找出所有有效的 job
	var activeJobs []*kbatch.Job
	var successfulJobs []*kbatch.Job
	var failedJobs []*kbatch.Job
	var mostRecentTime *time.Time // 记录其最近一次运行时间以便更新状态
isJobFinished
当一个 job 被标记为 “succeeded” 或 “failed” 时,我们认为这个任务处于 “finished” 状态。 Status conditions 允许我们给 job 对象添加额外的状态信息,开发人员或控制器可以通过 这些校验信息来检查 job 的完成或健康状态。
	isJobFinished := func(job *kbatch.Job) (bool, kbatch.JobConditionType) {
		for _, c := range job.Status.Conditions {
			if (c.Type == kbatch.JobComplete || c.Type == kbatch.JobFailed) && c.Status == corev1.ConditionTrue {
				return true, c.Type
			}
		}

		return false, ""
	}
getScheduledTimeForJob
使用辅助函数来提取创建 job 时注释中排定的执行时间
	getScheduledTimeForJob := func(job *kbatch.Job) (*time.Time, error) {
		timeRaw := job.Annotations[scheduledTimeAnnotation]
		if len(timeRaw) == 0 {
			return nil, nil
		}

		timeParsed, err := time.Parse(time.RFC3339, timeRaw)
		if err != nil {
			return nil, err
		}
		return &timeParsed, nil
	}
	for i, job := range childJobs.Items {
		_, finishedType := isJobFinished(&job)
		switch finishedType {
		case "": // ongoing
			activeJobs = append(activeJobs, &childJobs.Items[i])
		case kbatch.JobFailed:
			failedJobs = append(failedJobs, &childJobs.Items[i])
		case kbatch.JobComplete:
			successfulJobs = append(successfulJobs, &childJobs.Items[i])
		}

		//将启动时间存放在注释中,当job生效时可以从中读取
		scheduledTimeForJob, err := getScheduledTimeForJob(&job)
		if err != nil {
			log.Error(err, "unable to parse schedule time for child job", "job", &job)
			continue
		}
		if scheduledTimeForJob != nil {
			if mostRecentTime == nil {
				mostRecentTime = scheduledTimeForJob
			} else if mostRecentTime.Before(*scheduledTimeForJob) {
				mostRecentTime = scheduledTimeForJob
			}
		}
	}

	if mostRecentTime != nil {
		cronJob.Status.LastScheduleTime = &metav1.Time{Time: *mostRecentTime}
	} else {
		cronJob.Status.LastScheduleTime = nil
	}
	cronJob.Status.Active = nil
	for _, activeJob := range activeJobs {
		jobRef, err := ref.GetReference(r.Scheme, activeJob)
		if err != nil {
			log.Error(err, "unable to make reference to active job", "job", activeJob)
			continue
		}
		cronJob.Status.Active = append(cronJob.Status.Active, *jobRef)
	}
此处会记录我们观察到的 job 数量。为便于调试,略微提高日志级别。注意,这里没有使用 格式化字符串,使用由键值对构成的固定格式信息来输出日志。这样更易于过滤和查询日志
log.V(1).Info("job count", "active jobs", len(activeJobs), "successful jobs", len(successfulJobs), "failed jobs", len(failedJobs))
使用收集到日期信息来更新 CRD 状态。和之前类似,通过 client 来完成操作。
针对 status 这一子资源,我们可以使用Status部分的Update方法。
status 子资源会忽略掉对 spec 的变更。这与其它更新操作的发生冲突的风险更小, 而且实现了权限分离。
	if err := r.Status().Update(ctx, &cronJob); err != nil {
		log.Error(err, "unable to update CronJob status")
		return ctrl.Result{}, err
	}
更新状态后,后续要确保状态符合我们在 spec 定下的预期。
3: 根据保留的历史版本数清理过旧的 job
我们先清理掉一些版本太旧的 job,这样可以不用保留太多无用的 job
	// 注意: 删除操作采用的“尽力而为”策略
	// 如果个别 job 删除失败了,不会将其重新排队,直接结束删除操作
	if cronJob.Spec.FailedJobsHistoryLimit != nil {
		sort.Slice(failedJobs, func(i, j int) bool {
			if failedJobs[i].Status.StartTime == nil {
				return failedJobs[j].Status.StartTime != nil
			}
			return failedJobs[i].Status.StartTime.Before(failedJobs[j].Status.StartTime)
		})
		for i, job := range failedJobs {
			if int32(i) >= int32(len(failedJobs))-*cronJob.Spec.FailedJobsHistoryLimit {
				break
			}
			if err := r.Delete(ctx, job, client.PropagationPolicy(metav1.DeletePropagationBackground)); client.IgnoreNotFound(err) != nil {
				log.Error(err, "unable to delete old failed job", "job", job)
			} else {
				log.V(0).Info("deleted old failed job", "job", job)
			}
		}
	}

	if cronJob.Spec.SuccessfulJobsHistoryLimit != nil {
		sort.Slice(successfulJobs, func(i, j int) bool {
			if successfulJobs[i].Status.StartTime == nil {
				return successfulJobs[j].Status.StartTime != nil
			}
			return successfulJobs[i].Status.StartTime.Before(successfulJobs[j].Status.StartTime)
		})
		for i, job := range successfulJobs {
			if int32(i) >= int32(len(successfulJobs))-*cronJob.Spec.SuccessfulJobsHistoryLimit {
				break
			}
			if err := r.Delete(ctx, job, client.PropagationPolicy(metav1.DeletePropagationBackground)); (err) != nil {
				log.Error(err, "unable to delete old successful job", "job", job)
			} else {
				log.V(0).Info("deleted old successful job", "job", job)
			}
		}
	}
4: 检查是否被挂起
如果当前 cronjob 被挂起,不会再运行其下的任何 job,我们将其停止。这对于某些 job 出现异常 的排查非常有用。我们无需删除 cronjob 来中止其后续其他 job 的运行。
	if cronJob.Spec.Suspend != nil && *cronJob.Spec.Suspend {
		log.V(1).Info("cronjob suspended, skipping")
		return ctrl.Result{}, nil
	}
5: 计算 job 下一次执行时间
如果 cronjob 没被挂起,则我们需要计算它的下一次执行时间, 同时检查是否有遗漏的执行没被处理
getNextSchedule
借助强大的 cron 库,我们可以轻易的计算出定时任务的下一次执行时间。 我们根据最近一次的执行时间来计算下一次执行时间,如果没有找到最近 一次执行时间,则根据定时任务的创建时间来计算。
如果遗漏了很多次执行并且没有为这些执行设置截止时间。我们将其忽略 以避免异常造成控制器的频繁重启和资源紧张。
如果遗漏的执行次数并不多,我们返回最近一次的执行时间和下一次将要 执行的时间,这样我们可以知道该何时去调谐。
	getNextSchedule := func(cronJob *batch.CronJob, now time.Time) (lastMissed time.Time, next time.Time, err error) {
		sched, err := cron.ParseStandard(cronJob.Spec.Schedule)
		if err != nil {
			return time.Time{}, time.Time{}, fmt.Errorf("Unparseable schedule %q: %v", cronJob.Spec.Schedule, err)
		}

		// 出于优化的目的,我们可以使用点技巧。从上一次观察到的执行时间开始执行,
		// 这个执行时间可以被在这里被读取。但是意义不大,因为我们刚更新了这个值。

		var earliestTime time.Time
		if cronJob.Status.LastScheduleTime != nil {
			earliestTime = cronJob.Status.LastScheduleTime.Time
		} else {
			earliestTime = cronJob.ObjectMeta.CreationTimestamp.Time
		}
		if cronJob.Spec.StartingDeadlineSeconds != nil {
			// 如果开始执行时间超过了截止时间,不再执行
			schedulingDeadline := now.Add(-time.Second * time.Duration(*cronJob.Spec.StartingDeadlineSeconds))

			if schedulingDeadline.After(earliestTime) {
				earliestTime = schedulingDeadline
			}
		}
		if earliestTime.After(now) {
			return time.Time{}, sched.Next(now), nil
		}

		starts := 0
		for t := sched.Next(earliestTime); !t.After(now); t = sched.Next(t) {
			lastMissed = t
			// 一个 CronJob 可能会遗漏多次执行。举个例子,周五 5:00pm 技术人员下班后,
			// 控制器在 5:01pm 发生了异常。然后直到周二早上才有技术人员发现问题并
			// 重启控制器。那么所有的以1小时为周期执行的定时任务,在没有技术人员
			// 进一步的干预下,都会有 80 多个 job 在恢复正常后一并启动(如果 job 允许
			// 多并发和延迟启动)

			// 如果 CronJob 的某些地方出现异常,控制器或 apiservers (用于设置任务创建时间)
			// 的时钟不正确, 那么就有可能出现错过很多次执行时间的情形(跨度可达数十年)
			// 这将会占满控制器的CPU和内存资源。这种情况下,我们不需要列出错过的全部
			// 执行时间。

			starts++
			if starts > 100 {
				// 获取不到最近一次执行时间,直接返回空切片
				return time.Time{}, time.Time{}, fmt.Errorf("Too many missed start times (> 100). Set or decrease .spec.startingDeadlineSeconds or check clock skew.")
			}
		}
		return lastMissed, sched.Next(now), nil
	}
	// 计算出定时任务下一次执行时间(或是遗漏的执行时间)
	missedRun, nextRun, err := getNextSchedule(&cronJob, r.Now())
	if err != nil {
		log.Error(err, "unable to figure out CronJob schedule")
		// 重新排队直到有更新修复这次定时任务调度,不必返回错误
		return ctrl.Result{}, nil
	}
上述步骤执行完后,将准备好的请求加入队列直到下次执行, 然后确定这些 job 是否要实际执行
	scheduledResult := ctrl.Result{RequeueAfter: nextRun.Sub(r.Now())} // 保存以便别处复用
	log = log.WithValues("now", r.Now(), "next run", nextRun)
6: 如果 job 符合执行时机,并且没有超出截止时间,且不被并发策略阻塞,执行该 job
如果 job 遗漏了一次执行,且还没超出截止时间,把遗漏的这次执行也补上
	if missedRun.IsZero() {
		log.V(1).Info("no upcoming scheduled times, sleeping until next")
		return scheduledResult, nil
	}

	// 确保错过的执行没有超过截止时间
	log = log.WithValues("current run", missedRun)
	tooLate := false
	if cronJob.Spec.StartingDeadlineSeconds != nil {
		tooLate = missedRun.Add(time.Duration(*cronJob.Spec.StartingDeadlineSeconds) * time.Second).Before(r.Now())
	}
	if tooLate {
		log.V(1).Info("missed starting deadline for last run, sleeping till next")
		// TODO(directxman12): events
		return scheduledResult, nil
	}
如果确认 job 需要实际执行。我们有三种策略执行该 job。要么先等待现有的 job 执行完后,在启动本次 job; 或是直接覆盖取代现有的 job;或是不考虑现有的 job,直接作为新的 job 执行。因为缓存导致的信息有所延迟, 当更新信息后需要重新排队。
	// 确定要 job 的执行策略 —— 并发策略可能禁止多个job同时运行
	if cronJob.Spec.ConcurrencyPolicy == batch.ForbidConcurrent && len(activeJobs) > 0 {
		log.V(1).Info("concurrency policy blocks concurrent runs, skipping", "num active", len(activeJobs))
		return scheduledResult, nil
	}

	// 直接覆盖现有 job
	if cronJob.Spec.ConcurrencyPolicy == batch.ReplaceConcurrent {
		for _, activeJob := range activeJobs {
			// we don't care if the job was already deleted
			if err := r.Delete(ctx, activeJob, client.PropagationPolicy(metav1.DeletePropagationBackground)); client.IgnoreNotFound(err) != nil {
				log.Error(err, "unable to delete active job", "job", activeJob)
				return ctrl.Result{}, err
			}
		}
	}
确定如何处理现有 job 后,创建符合我们预期的 job
constructJobForCronJob
基于 CronJob 模版构建 job,从模板复制 spec 及对象的元信息。
然后在注解中设置执行时间,这样我们可以在每次的调谐中获取起作为“上一次执行时间”
最后,还需要设置 owner reference字段。当我们删除 CronJob 时,Kubernetes 垃圾收集 器会根据这个字段对应的 job。同时,当某个job状态发生变更(创建,删除,完成)时, controller-runtime 可以根据这个字段识别出要对那个 CronJob 进行调谐。
	constructJobForCronJob := func(cronJob *batch.CronJob, scheduledTime time.Time) (*kbatch.Job, error) {
		// job 名称带上执行时间以确保唯一性,避免排定执行时间的 job 创建两次
		name := fmt.Sprintf("%s-%d", cronJob.Name, scheduledTime.Unix())

		job := &kbatch.Job{
			ObjectMeta: metav1.ObjectMeta{
				Labels:      make(map[string]string),
				Annotations: make(map[string]string),
				Name:        name,
				Namespace:   cronJob.Namespace,
			},
			Spec: *cronJob.Spec.JobTemplate.Spec.DeepCopy(),
		}
		for k, v := range cronJob.Spec.JobTemplate.Annotations {
			job.Annotations[k] = v
		}
		job.Annotations[scheduledTimeAnnotation] = scheduledTime.Format(time.RFC3339)
		for k, v := range cronJob.Spec.JobTemplate.Labels {
			job.Labels[k] = v
		}
		if err := ctrl.SetControllerReference(cronJob, job, r.Scheme); err != nil {
			return nil, err
		}

		return job, nil
	}
	// 构建 job
	job, err := constructJobForCronJob(&cronJob, missedRun)
	if err != nil {
		log.Error(err, "unable to construct job from template")
		// job 的 spec 没有变更,无需重新排队
		return scheduledResult, nil
	}

	// ...在集群中创建 job
	if err := r.Create(ctx, job); err != nil {
		log.Error(err, "unable to create Job for CronJob", "job", job)
		return ctrl.Result{}, err
	}

	log.V(1).Info("created Job for CronJob run", "job", job)
7: 当 job 开始运行或到了 job 下一次的执行时间,重新排队
最终我们返回上述预备的结果。我们还需重新排队当任务还有下一次执行时。 这被视作最长截止时间——如果期间发生了变更,例如 job 被提前启动或是提前 结束,或被修改,我们可能会更早进行调谐。
	// 当有 job 进入运行状态后,重新排队,同时更新状态
	return scheduledResult, nil
}
启动 CronJob 控制器
最后,我们还要完善下我们的启动过程。为了让调谐器可以通过 job 的 owner 值快速找到 job。 我们需要一个索引。声明一个索引键,后续我们可以将其用于 client 的虚拟变量名中,从 job 对象中提取索引值。此处的索引会帮我们处理好 namespaces 的映射关系。所以如果 job 有 owner 值,我们快速地获取 owner 值。
另外,我们需要告知 manager,这个控制器拥有哪些 job。当对应的 job 发生变更或被删除时, 自动调用调谐器对 CronJob 进行调谐。
var (
	jobOwnerKey = ".metadata.controller"
	apiGVStr    = batch.GroupVersion.String()
)

func (r *CronJobReconciler) SetupWithManager(mgr ctrl.Manager) error {
	// 此处不是测试,我们需要创建一个真实的时钟
	if r.Clock == nil {
		r.Clock = realClock{}
	}

	if err := mgr.GetFieldIndexer().IndexField(context.Background(), &kbatch.Job{}, jobOwnerKey, func(rawObj runtime.Object) []string {
		//获取 job 对象,提取 owner...
		job := rawObj.(*kbatch.Job)
		owner := metav1.GetControllerOf(job)
		if owner == nil {
			return nil
		}
		// ...确保 owner 是个 CronJob...
		if owner.APIVersion != apiGVStr || owner.Kind != "CronJob" {
			return nil
		}

		// ...是 CronJob,返回
		return []string{owner.Name}
	}); err != nil {
		return err
	}

	return ctrl.NewControllerManagedBy(mgr).
		For(&batch.CronJob{}).
		Owns(&kbatch.Job{}).
		Complete(r)
}
看起来并不复杂,不过我们总算有了个能运行的控制器了。我们先在集群里测试下,如果一切顺利,将它部署起来!
你还记得关于 main 函数的一些要点吗?
但首先,还记得我们之前说过的 再次回顾 main.go 吗?让我们看一下哪些地方改变了,哪些是需要添加的。
Apache License
Copyright 2020 The Kubernetes authors.
Licensed under the Apache License, Version 2.0 (the “License”); you may not use this file except in compliance with the License. You may obtain a copy of the License at
http://www.apache.org/licenses/LICENSE-2.0
Unless required by applicable law or agreed to in writing, software distributed under the License is distributed on an “AS IS” BASIS, WITHOUT WARRANTIES OR CONDITIONS OF ANY KIND, either express or implied. See the License for the specific language governing permissions and limitations under the License.
Imports
package main

import (
	"flag"
	"os"

	"k8s.io/apimachinery/pkg/runtime"
	utilruntime "k8s.io/apimachinery/pkg/util/runtime"
	clientgoscheme "k8s.io/client-go/kubernetes/scheme"
	_ "k8s.io/client-go/plugin/pkg/client/auth/gcp"
	ctrl "sigs.k8s.io/controller-runtime"
	"sigs.k8s.io/controller-runtime/pkg/log/zap"

	batchv1 "tutorial.kubebuilder.io/project/api/v1"
	"tutorial.kubebuilder.io/project/controllers"
	// +kubebuilder:scaffold:imports
)
要注意的第一个区别是 kubebuilder 已经添加了一组新的 API 包(batchv1)到 scheme。这意味着可以在我们的控制器中使用这些对象。
如果我们要使用任何其他的 CRD,我们必须用相同的方法添加它们的 scheme。内置的类型例如 Job 就添加了它自己的 scheme clientgoscheme。
var (
	scheme   = runtime.NewScheme()
	setupLog = ctrl.Log.WithName("setup")
)

func init() {
	utilruntime.Must(clientgoscheme.AddToScheme(scheme))

	utilruntime.Must(batchv1.AddToScheme(scheme))
	// +kubebuilder:scaffold:scheme
}
另一个变化是 kubebuilder 已经添加了一个阻塞调用我们的 CornJob 控制器的 SetupWithManager 方法。
func main() {
old stuff
	var metricsAddr string
	var enableLeaderElection bool
	flag.StringVar(&metricsAddr, "metrics-addr", ":8080", "The address the metric endpoint binds to.")
	flag.BoolVar(&enableLeaderElection, "enable-leader-election", false,
		"Enable leader election for controller manager. "+
			"Enabling this will ensure there is only one active controller manager.")
	flag.Parse()

	ctrl.SetLogger(zap.New(zap.UseDevMode(true)))

	mgr, err := ctrl.NewManager(ctrl.GetConfigOrDie(), ctrl.Options{
		Scheme:             scheme,
		MetricsBindAddress: metricsAddr,
		Port:               9443,
		LeaderElection:     enableLeaderElection,
		LeaderElectionID:   "80807133.tutorial.kubebuilder.io",
	})
	if err != nil {
		setupLog.Error(err, "unable to start manager")
		os.Exit(1)
	}
	if err = (&controllers.CronJobReconciler{
		Client: mgr.GetClient(),
		Log:    ctrl.Log.WithName("controllers").WithName("CronJob"),
		Scheme: mgr.GetScheme(),
	}).SetupWithManager(mgr); err != nil {
		setupLog.Error(err, "unable to create controller", "controller", "CronJob")
		os.Exit(1)
	}
	if err = (&batchv1.CronJob{}).SetupWebhookWithManager(mgr); err != nil {
		setupLog.Error(err, "unable to create webhook", "webhook", "CronJob")
		os.Exit(1)
	}
我们也会为我们的类型设置 webhook,接下来我们会谈到它。我们只需要将他们添加到 manager。因为我们想分开运行 webhook,而不是在本地测试我们的控制器时运行它们,我们会将它们配置到环境变量中。
当我们本地运行的时候只需确保 ENABLE_WEBHOOKS=false。
	if os.Getenv("ENABLE_WEBHOOKS") != "false" {
		if err = (&batchv1.CronJob{}).SetupWebhookWithManager(mgr); err != nil {
			setupLog.Error(err, "unable to create webhook", "webhook", "Captain")
			os.Exit(1)
		}
	}
	// +kubebuilder:scaffold:builder
old stuff
	setupLog.Info("starting manager")
	if err := mgr.Start(ctrl.SetupSignalHandler()); err != nil {
		setupLog.Error(err, "problem running manager")
		os.Exit(1)
	}
}
现在 我们可以实现我们的控制器了。
实现默认/验证 webhook
如果你想为你的 CRD 实现一个 admission webhooks,
你需要做的一件事就是去实现Defaulter 和/或 Validator 接口。
Kubebuilder 会帮你处理剩下的事情,像下面这些:
- 创建 webhook 服务端。
- 确保服务端已添加到 manager 中。
- 为你的 webhooks 创建处理函数。
- 用路径在你的服务端中注册每个处理函数。
首先,让我们为我们的 CRD (CronJob) 创建一个 webhooks 的支架。我们将需要运行下面的命令并带上 --defaulting 和 --programmatic-validation 标志(因为我们的测试项目会用到默认和验证 webhooks):
kubebuilder create webhook --group batch --version v1 --kind CronJob --defaulting --programmatic-validation
这里会在你的 main.go 中搭建一个 webhook 函数的支架并用 manager 注册你的 webhook。
Apache License
Copyright 2020 The Kubernetes authors.
Licensed under the Apache License, Version 2.0 (the “License”); you may not use this file except in compliance with the License. You may obtain a copy of the License at
http://www.apache.org/licenses/LICENSE-2.0
Unless required by applicable law or agreed to in writing, software distributed under the License is distributed on an “AS IS” BASIS, WITHOUT WARRANTIES OR CONDITIONS OF ANY KIND, either express or implied. See the License for the specific language governing permissions and limitations under the License.
Go imports
package v1

import (
	"github.com/robfig/cron"
	apierrors "k8s.io/apimachinery/pkg/api/errors"
	"k8s.io/apimachinery/pkg/runtime"
	"k8s.io/apimachinery/pkg/runtime/schema"
	validationutils "k8s.io/apimachinery/pkg/util/validation"
	"k8s.io/apimachinery/pkg/util/validation/field"
	ctrl "sigs.k8s.io/controller-runtime"
	logf "sigs.k8s.io/controller-runtime/pkg/log"
	"sigs.k8s.io/controller-runtime/pkg/webhook"
)
接下来,我们为 webhooks 配置一个日志记录器。
var cronjoblog = logf.Log.WithName("cronjob-resource")
然后,我们将 webhook 和 manager 关联起来。
func (r *CronJob) SetupWebhookWithManager(mgr ctrl.Manager) error {
	return ctrl.NewWebhookManagedBy(mgr).
		For(r).
		Complete()
}
请注意我们用 kubebuilder 标记去生成 webhook 清单。 这个标记负责生成一个 mutating webhook 清单。
每个标记的意义可参考这里。
// +kubebuilder:webhook:path=/mutate-batch-tutorial-kubebuilder-io-v1-cronjob,mutating=true,failurePolicy=fail,groups=batch.tutorial.kubebuilder.io,resources=cronjobs,verbs=create;update,versions=v1,name=mcronjob.kb.io
我们使用 webhook.Defaulter 接口给我们的 CRD 设置默认值。
webhook 会自动调用这个默认值。
Default 方法期待修改接收者,设置默认值。
var _ webhook.Defaulter = &CronJob{}

// Default 实现了 webhook.Defaulter ,因此将为该类型注册一个webhook。
func (r *CronJob) Default() {
	cronjoblog.Info("default", "name", r.Name)

	if r.Spec.ConcurrencyPolicy == "" {
		r.Spec.ConcurrencyPolicy = AllowConcurrent
	}
	if r.Spec.Suspend == nil {
		r.Spec.Suspend = new(bool)
	}
	if r.Spec.SuccessfulJobsHistoryLimit == nil {
		r.Spec.SuccessfulJobsHistoryLimit = new(int32)
		*r.Spec.SuccessfulJobsHistoryLimit = 3
	}
	if r.Spec.FailedJobsHistoryLimit == nil {
		r.Spec.FailedJobsHistoryLimit = new(int32)
		*r.Spec.FailedJobsHistoryLimit = 1
	}
}
这个标记负责生成一个 validating webhook 清单。
// TODO(user): 如果你要想开启删除验证,请将 verbs 修改为 "verbs=create;update;delete" 。
// +kubebuilder:webhook:verbs=create;update,path=/validate-batch-tutorial-kubebuilder-io-v1-cronjob,mutating=false,failurePolicy=fail,groups=batch.tutorial.kubebuilder.io,resources=cronjobs,versions=v1,name=vcronjob.kb.io
用声明式验证来验证我们的 CRD 。一般来说,声明式验证应该就足够了,但是有时对于复杂的验证需要 更高级的用例。
例如,下面我们将看到,我们使用这个来验证格式良好的 cron 调度,而不需要构造一个很长的正则表达式。
如果实现了 webhook.Validator 接口并调用了这个验证,webhook 将会自动被服务。
ValidateCreate, ValidateUpdate 和 ValidateDelete 方法期望在创建、更新和删除时
分别验证其接收者。我们将 ValidateCreate 从 ValidateUpdate 分离开来以允许某些行为,像
使某些字段不可变,以至于仅可以在创建的时候去设置它们。我们也将 ValidateDelete 从
ValidateUpdate 分离开来以允许在删除的时候的不同验证行为。然而,这里我们只对 ValidateCreate
和 ValidateUpdate 用相同的共享验证。在 ValidateDelete 不做任何事情,因为我们不需要再
删除的时候做任何验证。
var _ webhook.Validator = &CronJob{}

// ValidateCreate 实现了 webhook.Validator,因此将为该类型注册一个webhook。
func (r *CronJob) ValidateCreate() error {
	cronjoblog.Info("validate create", "name", r.Name)

	return r.validateCronJob()
}

// ValidateUpdate 实现了 webhook.Validator,因此将为该类型注册一个webhook。
func (r *CronJob) ValidateUpdate(old runtime.Object) error {
	cronjoblog.Info("validate update", "name", r.Name)

	return r.validateCronJob()
}

// ValidateDelete 实现了 webhook.Validator,因此将为该类型注册一个webhook。
func (r *CronJob) ValidateDelete() error {
	cronjoblog.Info("validate delete", "name", r.Name)

	// TODO(user): 填写删除对象时你的验证逻辑。
	return nil
}
我们验证 CronJob 的 spec 和 name 。
func (r *CronJob) validateCronJob() error {
	var allErrs field.ErrorList
	if err := r.validateCronJobName(); err != nil {
		allErrs = append(allErrs, err)
	}
	if err := r.validateCronJobSpec(); err != nil {
		allErrs = append(allErrs, err)
	}
	if len(allErrs) == 0 {
		return nil
	}

	return apierrors.NewInvalid(
		schema.GroupKind{Group: "batch.tutorial.kubebuilder.io", Kind: "CronJob"},
		r.Name, allErrs)
}
OpenAPI schema 声明性地验证一些字段。
你可以在 API 中发现 kubebuilder 验证标记(前缀是 // +kubebuilder:validation)。
你可以通过运行 controller-gen crd -w 或者 这里 查找到
kubebuilder支持的用于声明验证的所有标记。
func (r *CronJob) validateCronJobSpec() *field.Error {
	// kubernetes API machinery 的字段助手会帮助我们很好地返回结构化的验证错误。
	return validateScheduleFormat(
		r.Spec.Schedule,
		field.NewPath("spec").Child("schedule"))
}
我们将需要验证 cron 调度是否有良好的格式。
func validateScheduleFormat(schedule string, fldPath *field.Path) *field.Error {
	if _, err := cron.ParseStandard(schedule); err != nil {
		return field.Invalid(fldPath, schedule, err.Error())
	}
	return nil
}
Validate object name
验证 schema 可以声明性地验证字符串字段的长度。
但是 ObjectMeta.Name 字段定义在 apimachinery 仓库下的共享的包中,所以
我们不能用验证 schema 声明性地验证它。
func (r *CronJob) validateCronJobName() *field.Error {
	if len(r.ObjectMeta.Name) > validationutils.DNS1035LabelMaxLength-11 {
		// job 的名字长度像所有 Kubernetes 对象一样是是 63 字符(必须适合 DNS 子域)。
		// 在创建 job 的时候,cronjob 的控制器会添加一个 11 字符的后缀(`-$TIMESTAMP`)。
		// job 的名字长度限制在 63 字符。因此 cronjob 的名字的长度一定小于等于 63-11=52 。
		// 如果这里我们没有进行验证,后面当job创建的时候就会失败。
		return field.Invalid(field.NewPath("metadata").Child("name"), r.Name, "must be no more than 52 characters")
	}
	return nil
}
运行和部署 controller
要测试 controller,我们可以在集群本地运行它。不过,在开始之前,我们需要按照 快速入门 安装 CRD。如果需要,将使用 controller-tools 自动更新 YAML 清单:
make install
现在我们已经安装了 CRD,在集群上运行 controller 了。这将使用与集群连接所用的任何凭据,因此我们现在不必担心 RBAC。
在单独的终端中运行
make run ENABLE_WEBHOOKS=false
您应该会看到 controller 关于启动的日志,但它还没有做任何事情。
此时,我们需要一个 CronJob 进行测试。让我们写一个样例到 config/samples/batch_v1_cronjob.yaml,并使用:
apiVersion: batch.tutorial.kubebuilder.io/v1
kind: CronJob
metadata:
  name: cronjob-sample
spec:
  schedule: "*/1 * * * *"
  startingDeadlineSeconds: 60
  concurrencyPolicy: Allow # explicitly specify, but Allow is also default.
  jobTemplate:
    spec:
      template:
        spec:
          containers:
          - name: hello
            image: busybox
            args:
            - /bin/sh
            - -c
            - date; echo Hello from the Kubernetes cluster
          restartPolicy: OnFailure
kubectl create -f config/samples/batch_v1_cronjob.yaml
此时,您应该看到一系列的活动。如果看到变更,则应该看到您的 cronjob 正在运行,并且正在更新状态:
kubectl get cronjob.batch.tutorial.kubebuilder.io -o yaml
kubectl get job
现在我们知道它正在工作,我们可以在集群中运行它。停止 make run 调用,然后运行
make docker-build docker-push IMG=<some-registry>/<project-name>:tag
make deploy IMG=<some-registry>/<project-name>:tag
如果像以前一样再次列出 cronjobs,我们应该会看到控制器再次运行!
部署 cert manager
我们建议使用 cert manager 为 webhook 服务器提供证书。只要其他解决方案将证书放在期望的位置,也将会起作用。
你可以按照 cert manager 文档 进行安装。
Cert manager 还有一个叫做 CA 注入器的组件,该组件负责将 CA 捆绑注入到 Mutating|ValidatingWebhookConfiguration 中。
为此,你需要在 Mutating|ValidatingWebhookConfiguration 对象中使用带有 key 为 cert-manager.io/inject-ca-from 的注释。
注释的值应指向现有的证书 CR 实例,格式为 <certificate-namespace>/<certificate-name>。
这是我们用于注释 Mutating|ValidatingWebhookConfiguration 对象的 kustomize patch。
# This patch add annotation to admission webhook config and
# the variables $(CERTIFICATE_NAMESPACE) and $(CERTIFICATE_NAME) will be substituted by kustomize.
apiVersion: admissionregistration.k8s.io/v1beta1
kind: MutatingWebhookConfiguration
metadata:
  name: mutating-webhook-configuration
  annotations:
    cert-manager.io/inject-ca-from: $(CERTIFICATE_NAMESPACE)/$(CERTIFICATE_NAME)
---
apiVersion: admissionregistration.k8s.io/v1beta1
kind: ValidatingWebhookConfiguration
metadata:
  name: validating-webhook-configuration
  annotations:
    cert-manager.io/inject-ca-from: $(CERTIFICATE_NAMESPACE)/$(CERTIFICATE_NAME)
部署 Admission Webhooks
Kind Cluster
建议使用 kind 集群来更快速的开发 webhook。 为什么呢?
- 你可以在 1 分钟内本地启动有多个节点的集群。
- 你可以在几秒中内关闭它。
- 你不需要把你的镜像推送到远程仓库。
证书管理
你要遵循这个来安装证书管理器。
构建你的镜像
运行下面的命令来本地构建你的镜像。
make docker-build
如果你使用的是 kind 集群,那么你不需要把镜像推送到远程容器仓库。你可以直接加载你本地的镜像到你的 kind 集群:
kind load docker-image your-image-name:your-tag
部署 Webhooks
你需要通过启用 webhook 和证书管理配置。config/default/kustomization.yaml 应该看起来是这样子的:
# 为所有资源添加名字空间
namespace: project-system

# 这个字段的值会加在所有资源名字的前面,比如一个叫做 "wordpress" 的 deployment 会变成 "alices-wordpress"。
# 注意它应该和上面名字空间字段的前缀匹配('-' 之前的字符串)。
namePrefix: project-

# 要给所有资源和选择器添加的标签。
#commonLabels:
#  someName: someValue

bases:
- ../crd
- ../rbac
- ../manager
# [WEBHOOK] 用于启用 webhook,取消注释所有有 [WEBHOOK] 前缀的字段,包括在 crd/kustomization.yaml 中的。
- ../webhook
# [CERTMANAGER] 用于启用证书管理,需要取消带有 'CERTMANAGER' 的所有字段的注释。'WEBHOOK' 组件是必须的。
- ../certmanager
# [PROMETHEUS] 用于启用 prometheus 监控,取消带有 'PROMETHEUS' 的左右字段的注释。
#- ../prometheus

patchesStrategicMerge:
  # 通过给 /metrics 的 endpoint 加上认证来保护它。
  # 如果你想你的 controller-manager 暴露 /metrics 的 endpoint 并且不需要任何授权,那么注释掉下面这行。
- manager_auth_proxy_patch.yaml

# [WEBHOOK] 用于启用 webhook,取消注释所有有 [WEBHOOK] 前缀的字段,包括在 crd/kustomization.yaml 中的。
- manager_webhook_patch.yaml

# [CERTMANAGER] 用于启用证书管理,需要取消带有 'CERTMANAGER' 的所有字段的注释。
# 取消在 crd/kustomization.yaml 中 'CERTMANAGER' 部分的注释可以在 admission webhook 中启用 CA 注入。
# 需要启用 'CERTMANAGER' 来使用 ca 注入。
- webhookcainjection_patch.yaml

# 下面的配置是为了教授 kustomize 如何进行变量替换。
vars:
# [CERTMANAGER] 用于启用证书管理,取消带有 'CERTMANAGER' 前缀的所有部分注释。
- name: CERTIFICATE_NAMESPACE # CR 证书的命名空间
  objref:
    kind: Certificate
    group: cert-manager.io
    version: v1alpha2
    name: serving-cert # 这个名字应该和 certificate.yaml 文件中的一个名字相匹配
  fieldref:
    fieldpath: metadata.namespace
- name: CERTIFICATE_NAME
  objref:
    kind: Certificate
    group: cert-manager.io
    version: v1alpha2
    name: serving-cert # 这个名字应该和 certificate.yaml 文件中的一个名字相匹配
- name: SERVICE_NAMESPACE # service 的命名空间
  objref:
    kind: Service
    version: v1
    name: webhook-service
  fieldref:
    fieldpath: metadata.namespace
- name: SERVICE_NAME
  objref:
    kind: Service
    version: v1
    name: webhook-service
现在你可以通过下面的命令把它部署到你的集群中了:
make deploy IMG=<some-registry>/<project-name>:tag
等一会儿,webhook 的 pod 启动并且也提供了证书认证。这个过程通常需要 1 分钟。
现在你可以创建一个有效的 CronJob 来测试你的 webhook。这个过程应该会顺利通过的。
kubectl create -f config/samples/batch_v1_cronjob.yaml
你也能试着创建一个无效的 CronJob(比如使用一个非法格式的调度字段)。你应该可以看到创建失败并且有验证错误信息。
编写控制器测试示例
测试 Kubernetes 控制器是一个大的课题,kubebuilder 为您生成的样板测试文件相当少。
为了带您了解 Kubebuilder 生成的控制器的集成测试模式,我们将重新阅读一遍我们在第一篇教程中构建的 CronJob,并为它编写一个简单的测试。
基本的方法是,在生成的 suite_test.go 文件中,您将用 envtest 去创建一个本地 Kubernetes API 服务端,并实例化和运行你的控制器,然后编写附加的 *_test.go 文件并用 Ginko 去测试它。
如果您想修改您的 envtest 集群的配置方式,请查看 编写和运行集成测试 和 envtest docs 章节。
测试环境配置
当我们在之前章节用 kubebuilder create api 创建 CronJob API,Kubebuilder 已经为您创建了一些测试工作。
Kubebuilder 生成了一个用于配置基本测试环境框架的文件 controllers/suite_test.go 。
首先,它将包含必要的 imports 。
Apache License
Licensed under the Apache License, Version 2.0 (the “License”); you may not use this file except in compliance with the License. You may obtain a copy of the License at
http://www.apache.org/licenses/LICENSE-2.0
Unless required by applicable law or agreed to in writing, software distributed under the License is distributed on an “AS IS” BASIS, WITHOUT WARRANTIES OR CONDITIONS OF ANY KIND, either express or implied. See the License for the specific language governing permissions and limitations under the License.
Imports
package controllers

import (
	"path/filepath"
	"testing"

	. "github.com/onsi/ginkgo"
	. "github.com/onsi/gomega"
	"k8s.io/client-go/kubernetes/scheme"
	"k8s.io/client-go/rest"
	ctrl "sigs.k8s.io/controller-runtime"
	"sigs.k8s.io/controller-runtime/pkg/client"
	"sigs.k8s.io/controller-runtime/pkg/envtest"
	"sigs.k8s.io/controller-runtime/pkg/envtest/printer"
	logf "sigs.k8s.io/controller-runtime/pkg/log"
	"sigs.k8s.io/controller-runtime/pkg/log/zap"

	batchv1 "tutorial.kubebuilder.io/project/api/v1"
	// +kubebuilder:scaffold:imports
)

// 这些测试示例使用了 Ginkgo (BDD-style Go 测试框架)。学习更多关于 Ginkgo 请参考 http://onsi.github.io/ginkgo/。
现在,让我们看看生成的代码。
var cfg *rest.Config
var k8sClient client.Client //  您将在你的测试代码中使用这个 client。
var testEnv *envtest.Environment

var _ = BeforeSuite(func(done Done) {
	logf.SetLogger(zap.New(zap.WriteTo(GinkgoWriter), zap.UseDevMode(true)))
首先, envtest 集群将从 Kubebuilder 为您生成的 CRD 目录下读取 CRD 信息。
	By("bootstrapping test environment")
	testEnv = &envtest.Environment{
		CRDDirectoryPaths: []string{filepath.Join("..", "config", "crd", "bases")},
	}
然后,我们启动 envtest 集群。
	var err error
	cfg, err = testEnv.Start()
	Expect(err).ToNot(HaveOccurred())
	Expect(cfg).ToNot(BeNil())
自动生成的测试代码将把 CronJob Kind schema 添加到默认的 client-go k8s scheme 中。 这保证了 CronJob 的 API/Kind 可以在我们控制器测试代码中正常使用。
	err = batchv1.AddToScheme(scheme.Scheme)
	Expect(err).NotTo(HaveOccurred())
schemas 之后,你将看到下面标记。 当一个新的 API 添加到项目中,这个标记允许新的 schemas 自动的添加到这里。
// +kubebuilder:scaffold:scheme
为我们测试 CRUD 操作创建一个客户端。
	k8sClient, err = client.New(cfg, client.Options{Scheme: scheme.Scheme})
	Expect(err).ToNot(HaveOccurred())
	Expect(k8sClient).ToNot(BeNil())
然而,这个自动生成的文件缺少了实际启动控制器的方法。 上面的代码将会建立一个和您自定义的 Kind 交互的客户端,但是无法测试您的控制器的行为。 如果你想要测试自定义的控制器逻辑,您需要添加一些相似的管理逻辑到 BeforeSuite() 函数, 这样就可以将你的自定义控制器运行在这个测试集群上。
您可能注意到了,下面运行在控制器中的逻辑代码几乎和您的 CronJob 项目中的 main.go 中是相同的! 唯一不同的是 manager 启动在一个独立的 goroutine 中,因此,当您运行完测试后,它不会阻止 envtest 的清理工作。
一旦添加了下面的代码,你将可以删除掉上面的 k8sClient,因为你可以从 manager 中获取到 k8sClient (如下所示)。
	k8sManager, err := ctrl.NewManager(cfg, ctrl.Options{
		Scheme: scheme.Scheme,
	})
	Expect(err).ToNot(HaveOccurred())

	err = (&CronJobReconciler{
		Client: k8sManager.GetClient(),
		Log:    ctrl.Log.WithName("controllers").WithName("CronJob"),
	}).SetupWithManager(k8sManager)
	Expect(err).ToNot(HaveOccurred())

	go func() {
		err = k8sManager.Start(ctrl.SetupSignalHandler())
		Expect(err).ToNot(HaveOccurred())
	}()

	k8sClient = k8sManager.GetClient()
	Expect(k8sClient).ToNot(BeNil())

	close(done)
}, 60)
Kubebuilder 还为清除 envtest 和在 controller/ 目录中实际运行测试的文件生成样板函数。 你不需要更改这部分代码
var _ = AfterSuite(func() {
	By("tearing down the test environment")
	err := testEnv.Stop()
	Expect(err).ToNot(HaveOccurred())
})

func TestAPIs(t *testing.T) {
	RegisterFailHandler(Fail)

	RunSpecsWithDefaultAndCustomReporters(t,
		"Controller Suite",
		[]Reporter{printer.NewlineReporter{}})
}
现在,您已经在测试集群上运行了控制器,并且客户端已经准备好对 CronJob 执行操作,我们可以开始编写集成测试了!
测试控制器行为
理想情况下,每个控制器都应该存在对应的测试文件 <kind>_conroller_test.go,并在 test_suite.go 中调用。
接下来,让我们为CronJob控制器编写示例测试(cronjob_controller_test.go。)
Apache License
Licensed under the Apache License, Version 2.0 (the “License”); you may not use this file except in compliance with the License. You may obtain a copy of the License at
http://www.apache.org/licenses/LICENSE-2.0
Unless required by applicable law or agreed to in writing, software distributed under the License is distributed on an “AS IS” BASIS, WITHOUT WARRANTIES OR CONDITIONS OF ANY KIND, either express or implied. See the License for the specific language governing permissions and limitations under the License.
Imports
像往常一样,我们从必要的导入开始。我们还定义了一些有用的变量。
package controllers

import (
	"context"
	"reflect"
	"time"

	. "github.com/onsi/ginkgo"
	. "github.com/onsi/gomega"
	batchv1 "k8s.io/api/batch/v1"
	batchv1beta1 "k8s.io/api/batch/v1beta1"
	v1 "k8s.io/api/core/v1"
	metav1 "k8s.io/apimachinery/pkg/apis/meta/v1"
	"k8s.io/apimachinery/pkg/types"

	cronjobv1 "tutorial.kubebuilder.io/project/api/v1"
)
编写一个简单的集成测试的第一步是真实的创建一个您可以运行测试的 CronJob 的实例。 请注意,要创建一个 CronJob,你需要先创建一个包含 CronJob 定义的 stub 结构体。
请注意,当我们创建一个存根 CronJob ,CronJob 还需要它所需要的下游对象的存根。 没有下面存根的 Job 模板 spec 和 Pod 模板 spec ,Kubernetes API 将不能创建 CronJob 。
var _ = Describe("CronJob controller", func() {

	// 定义对象名称、测试超时时间、持续时间以及测试间隔等常量。
	const (
		CronjobName      = "test-cronjob"
		CronjobNamespace = "default"
		JobName          = "test-job"

		timeout  = time.Second * 10
		duration = time.Second * 10
		interval = time.Millisecond * 250
	)

	Context("When updating CronJob Status", func() {
		It("Should increase CronJob Status.Active count when new Jobs are created", func() {
			By("By creating a new CronJob")
			ctx := context.Background()
			cronJob := &cronjobv1.CronJob{
				TypeMeta: metav1.TypeMeta{
					APIVersion: "batch.tutorial.kubebuilder.io/v1",
					Kind:       "CronJob",
				},
				ObjectMeta: metav1.ObjectMeta{
					Name:      CronjobName,
					Namespace: CronjobNamespace,
				},
				Spec: cronjobv1.CronJobSpec{
					Schedule: "1 * * * *",
					JobTemplate: batchv1beta1.JobTemplateSpec{
						Spec: batchv1.JobSpec{
							// 简单起见,我们只填写必需的字段。
							Template: v1.PodTemplateSpec{
								Spec: v1.PodSpec{
									// 简单起见,我们只填写必需的字段。
									Containers: []v1.Container{
										{
											Name:  "test-container",
											Image: "test-image",
										},
									},
									RestartPolicy: v1.RestartPolicyOnFailure,
								},
							},
						},
					},
				},
			}
			Expect(k8sClient.Create(ctx, cronJob)).Should(Succeed())
在创建这个 CronJob 之后,让我们检查 CronJob 的 Spec 字段与我们传入的字段是否匹配。 请注意,因为 k8s apiserver 在前面的 ‘Create()’ 调用之后可能还没有完成 CronJob 的创建,我将用 Gomega 的 Eventually() 测试函数代替 Expect() 去给 apiserver 一个机会去完成CronJob的创建。
Eventually() 方法每隔一个时间间隔执行一次参数中指定的函数,直到满足下列两个条件之一才会退出方法。
(a) 函数的输出与Should()调用的期望输出匹配
(b) 重试时间(重试次数 * 间隔周期)大于指定的超时时间
在下面的示例中,timeout 和 interval 是我们选择的 Go Duration 值。
			cronjobLookupKey := types.NamespacedName{Name: CronjobName, Namespace: CronjobNamespace}
			createdCronjob := &cronjobv1.CronJob{}

			// 创建操作可能不会立马完成,因此我们需要多次重试去获取这个新建的 CronJob。
			Eventually(func() bool {
				err := k8sClient.Get(ctx, cronjobLookupKey, createdCronjob)
				if err != nil {
					return false
				}
				return true
			}, timeout, interval).Should(BeTrue())
			// 让我们确保我们的Schedule 字符串值被正确地转换/处理。
			Expect(createdCronjob.Spec.Schedule).Should(Equal("1 * * * *"))
现在,我们已经在我们的测试集群中创建了一个CronJob,下一步是写一个测试用例去真正的测试我们 CronJob 控制器的行为。 让我们测试一下 CronJob 控制器根据正在运行的 Jobs 更新 CronJob.Status.Active 的逻辑。 我们将验证当 CronJob 有一个活动的下游 Job ,它的 CronJob.Status.Active 字段包含对该Job的引用。
首先,我们应该获取之前创建的测试 CronJob ,并验证它目前没有任何正在运行的 Job。
在这里我们使用 Gomega 的 Consistently() 检查,以确保正在运行的 Job 总数在一段时间内保持为 0 。
			By("By checking the CronJob has zero active Jobs")
			Consistently(func() (int, error) {
				err := k8sClient.Get(ctx, cronjobLookupKey, createdCronjob)
				if err != nil {
					return -1, err
				}
				return len(createdCronjob.Status.Active), nil
			}, duration, interval).Should(Equal(0))
下一步,为我们的 CronJob 创建一个 Job 的 stub 对象以及它的下游模板 specs 。 我们将 Job 的状态 “Active” 设置为 2,来模拟当前 Job 运行了 2 个 pod ,这表示我们的 Job 正在运行。
然后,我们获取 Job 的 stub 对象 ,并将其所有者引用指向我们的测试 CronJob 。 这确保了测试 Job 属于我们的测试 CronJob ,并被它跟踪。 一旦完成,我们就创建新的 Job 实例。
			By("By creating a new Job")
			testJob := &batchv1.Job{
				ObjectMeta: metav1.ObjectMeta{
					Name:      JobName,
					Namespace: CronjobNamespace,
				},
				Spec: batchv1.JobSpec{
					Template: v1.PodTemplateSpec{
						Spec: v1.PodSpec{
							// 简单起见,我们只填写必需的字段。
							Containers: []v1.Container{
								{
									Name:  "test-container",
									Image: "test-image",
								},
							},
							RestartPolicy: v1.RestartPolicyOnFailure,
						},
					},
				},
				Status: batchv1.JobStatus{
					Active: 2,
				},
			}

			// 请注意,所有者引用需要配置 CronJob 的 GroupVersionKind。
			kind := reflect.TypeOf(cronjobv1.CronJob{}).Name()
			gvk := cronjobv1.GroupVersion.WithKind(kind)

			controllerRef := metav1.NewControllerRef(createdCronjob, gvk)
			testJob.SetOwnerReferences([]metav1.OwnerReference{*controllerRef})
			Expect(k8sClient.Create(ctx, testJob)).Should(Succeed())
添加这个 Job 到我们的测试 CronJob 中将会触发我们的控制器的协调逻辑。 之后,我们可以编写一个测试用例验证我们的控制器最终是否按照预期更新了我们的 CronJob 的状态字段!
			By("By checking that the CronJob has one active Job")
			Eventually(func() ([]string, error) {
				err := k8sClient.Get(ctx, cronjobLookupKey, createdCronjob)
				if err != nil {
					return nil, err
				}

				names := []string{}
				for _, job := range createdCronjob.Status.Active {
					names = append(names, job.Name)
				}
				return names, nil
			}, timeout, interval).Should(ConsistOf(JobName), "should list our active job %s in the active jobs list in status", JobName)
		})
	})

})
完成这些代码后,您可以在 controllers/ 目录下执行 go test ./... ,运行新的测试代码!
上面状态更新的示例演示了一个带有下游对象的自定义 Kind 的通用测试策略。到此,希望您已经学到了下列用于测试控制器行为的方法:
- 配置你的控制器运行在 envtest 集群上
- 为创建测试对象编写测试示例
- 隔离对对象的更改,以测试特定的控制器行为
高级示例
还有更多使用 envtest 来严格测试控制器行为的例子。包括:
- Azure Databricks Operator: 仔细阅读
suite_test.go以及那个目录下所有的*_test.go文件 例如这个。
结语
至此,我们已经实现了一个功能比较完备的 Cronjob controller 了,利用了 KubeBuilder 的大部分特性,而且用 envtest 写了 controller 的测试。
如果你想要知道更多,可以看 Multi-Version Tutorial,学习如何给项目添加新API。
另外,你可以自己尝试完成以下步骤--稍后我们会有一个教程。
kubectl get添加额外的列打印
教程:多版本 API
大多数项目都是从一个 alpha API 开始的,这个 API 会随着发布版本的不同而变化。 然后,最终大多数项目将会转向更稳定的版本。一旦你的 API 足够的稳定,你就不能够对它做破坏性的修改。 这就是 API 版本发挥作用的地方。
让我们对 CronJob API spec 做一些改变,确保我们的 CronJob 项目支持所有不同的版本。
如果你还没有准备好,请确保你已经阅读过了基础的 CronJob 教程。
接下来,让我们弄清楚我们想要做哪些更改。
修改
Kubernetes API 中一个相当常见的改变是获取一些非结构化的或者存储在一些特殊的字符串格式的数据,
并将其修改为结构化的数据。我们的 schedule 字段非常适合这个案例 -- 现在,在 v1 中,我们的 schedules 是这样的
schedule: "*/1 * * * *"
这是一个非常典型的特殊字符串格式的例子(除非你是一个 Unix 系统管理员,否则非常难以理解它)。
让我们来使它更结构化一点。根据我们 CronJob 代码,我们支持”standard” Cron 格式。
在 Kubernetes 里,所有版本都必须通过彼此进行安全的往返。这意味着如果我们从版本 1 转换到版本 2,然后回退到版本 1,我们一定会失去一些信息。因此,我们对 API 所做的任何更改都必须与 v1 中所支持的内容兼容还需要确保我们添加到 v2 中的任何内容在 v1 中都得到支持。某些情况下,这意味着我们需要向 V1 中添加新的字段,但是在我们这个例子中,我们不会这么做,因为我们没有添加新的功能。
记住这些,让我们将上面的示例转换为稍微更结构化一点:
schedule:
  minute: */1
现在,至少我们每个字段都有了标签,但是我们仍然可以为每个字段轻松地支持所有不同的语法。
对这个改变我们将需要一个新的 API 版本。我们称它为 v2:
kubebuilder create api --group batch --version v2 --kind CronJob
现在,让我们复制已经存在的类型,并做一些改变:
Apache License
Copyright 2020 The Kubernetes authors.
Licensed under the Apache License, Version 2.0 (the “License”); you may not use this file except in compliance with the License. You may obtain a copy of the License at
http://www.apache.org/licenses/LICENSE-2.0
Unless required by applicable law or agreed to in writing, software distributed under the License is distributed on an “AS IS” BASIS, WITHOUT WARRANTIES OR CONDITIONS OF ANY KIND, either express or implied. See the License for the specific language governing permissions and limitations under the License.
因为我们现在在v2 包中,controller-gen 将自动假设这是对于 v2 版本的。
我们可以用+versionNamemarker去重写它。
package v2
Imports
import (
	batchv1beta1 "k8s.io/api/batch/v1beta1"
	corev1 "k8s.io/api/core/v1"
	metav1 "k8s.io/apimachinery/pkg/apis/meta/v1"
)

// 编辑这个文件!这是你拥有的脚手架!
// 注意: json 标签是必需的。为了字段能够被序列化任何你添加的新的字段一定有 json 标签。
除了将 schedule 字段更改为一个新类型外,我们将基本上保持 spec 不变。
// CronJobSpec 定义了 CronJob 期待的状态
type CronJobSpec struct {
	// Cron 格式的 schedule,详情请看https://en.wikipedia.org/wiki/Cron。
	Schedule CronSchedule `json:"schedule"`
The rest of Spec
	// +kubebuilder:validation:Minimum=0

	// 对于开始 job 以秒为单位的可选的并如果由于任何原因错失了调度的时间截止日期。未执行的
	// job 将被统计为失败的 job 。
	// +optional
	StartingDeadlineSeconds *int64 `json:"startingDeadlineSeconds,omitempty"`

	// 指定如何处理job的并发执行。
	// 有效的值是:
	// - "Allow" (默认): 允许 CronJobs 并发执行;
	// - "Forbid":禁止并发执行,如果之前运行的还没有完成,跳过下一次执行;
	// - "Replace": 取消当前正在运行的 job 并用新的 job 替换它
	// +optional
	ConcurrencyPolicy ConcurrencyPolicy `json:"concurrencyPolicy,omitempty"`

	// 此标志告诉控制器暂停后续执行,它不会应用到已经开始执行的 job 。默认值是 false。
	// +optional
	Suspend *bool `json:"suspend,omitempty"`

	// 指定当执行一个 CronJob 时将会被创建的 job 。
	JobTemplate batchv1beta1.JobTemplateSpec `json:"jobTemplate"`

	// +kubebuilder:validation:Minimum=0

	// 要保留的成功完成的 jobs 的数量。
	// 这是一个用来区分明确 0 值和未指定的指针。
	// +optional
	SuccessfulJobsHistoryLimit *int32 `json:"successfulJobsHistoryLimit,omitempty"`

	// +kubebuilder:validation:Minimum=0

	// 要保留的失败的 jobs 的数量。
	// 这是一个用来区分明确 0 值和未指定的指针。
	// +optional
	FailedJobsHistoryLimit *int32 `json:"failedJobsHistoryLimit,omitempty"`
}
接下来,我们定义一个类型存储我们的 schedule 。 基于我们上面提议的 YAML 格式,每个对应的 Cron “field” 都有一个字段。
// 描述一个Cron schedule。
type CronSchedule struct {
	// 指定 job 执行的分钟数。
	// +optional
	Minute *CronField `json:"minute,omitempty"`
	// 指定 job 执行的小时数。
	// +optional
	Hour *CronField `json:"hour,omitempty"`
	// 指定 job 执行的月的天数。
	// +optional
	DayOfMonth *CronField `json:"dayOfMonth,omitempty"`
	// 指定 job 执行的月数。
	// +optional
	Month *CronField `json:"month,omitempty"`
	// 指定 job 执行的一周的天数。
	// +optional
	DayOfWeek *CronField `json:"dayOfWeek,omitempty"`
}
最后,我们定义一个封装器类型来表示一个字段。 我们可以为这个字段附加一些额外的验证,但是现在我们只仅仅用它做文档的目的。
// 表示一个 Cron 字段说明符。
type CronField string
Other Types
所有其他类型将保持与以前相同。
// ConcurrencyPolicy 描述 job 将会被怎样处理。仅仅下面并发策略中的一种可以被指定。
// 如果没有指定下面策略的任何一种,那么默认的一个是 AllowConcurrent 。
// +kubebuilder:validation:Enum=Allow;Forbid;Replace
type ConcurrencyPolicy string

const (
	// AllowConcurrent 允许 CronJobs 并发执行.
	AllowConcurrent ConcurrencyPolicy = "Allow"

	// ForbidConcurrent 禁止并发执行, 如果之前运行的还没有完成,跳过下一次执行
	ForbidConcurrent ConcurrencyPolicy = "Forbid"

	// ReplaceConcurrent 取消当前正在运行的 job 并用新的 job 替换它。
	ReplaceConcurrent ConcurrencyPolicy = "Replace"
)

// CronJobStatus 定义了 CronJob 观察的的状态
type CronJobStatus struct {
	// 插入额外的 STATUS 字段 - 定义集群观察的状态
	// 重要:修改了这个文件之后运行"make"去重新生成代码

	// 一个存储当前正在运行 job 的指针列表。
	// +optional
	Active []corev1.ObjectReference `json:"active,omitempty"`

	// 当 job 最后一次成功被调度的信息。
	// +optional
	LastScheduleTime *metav1.Time `json:"lastScheduleTime,omitempty"`
}

// +kubebuilder:object:root=true
// +kubebuilder:subresource:status

// CronJob 是 cronjobs API 的 Schema
type CronJob struct {
	metav1.TypeMeta   `json:",inline"`
	metav1.ObjectMeta `json:"metadata,omitempty"`

	Spec   CronJobSpec   `json:"spec,omitempty"`
	Status CronJobStatus `json:"status,omitempty"`
}

// +kubebuilder:object:root=true

// CronJobList 包含了一个 CronJob 的列表
type CronJobList struct {
	metav1.TypeMeta `json:",inline"`
	metav1.ListMeta `json:"metadata,omitempty"`
	Items           []CronJob `json:"items"`
}

func init() {
	SchemeBuilder.Register(&CronJob{}, &CronJobList{})
}
存储版本
Apache License
Copyright 2020 The Kubernetes authors.
Licensed under the Apache License, Version 2.0 (the “License”); you may not use this file except in compliance with the License. You may obtain a copy of the License at
http://www.apache.org/licenses/LICENSE-2.0
Unless required by applicable law or agreed to in writing, software distributed under the License is distributed on an “AS IS” BASIS, WITHOUT WARRANTIES OR CONDITIONS OF ANY KIND, either express or implied. See the License for the specific language governing permissions and limitations under the License.
package v1
Imports
import (
	batchv1beta1 "k8s.io/api/batch/v1beta1"
	corev1 "k8s.io/api/core/v1"
	metav1 "k8s.io/apimachinery/pkg/apis/meta/v1"
)

// 编辑这个文件!这是你拥有的脚手架!
// 注意: json 标签是必需的。为了字段能够被序列化任何你添加的新的字段一定有 json 标签。
old stuff
// CronJobSpec 定义了 CronJob 期待的状态
type CronJobSpec struct {
	// +kubebuilder:validation:MinLength=0

	// Cron 格式的 schedule,详情请看https://en.wikipedia.org/wiki/Cron。
	Schedule string `json:"schedule"`

	// +kubebuilder:validation:Minimum=0

	// 对于开始 job 以秒为单位的可选的并如果由于任何原因错失了调度的时间截止日期。未执行的
	// job 将被统计为失败的 job 。
	// +optional
	StartingDeadlineSeconds *int64 `json:"startingDeadlineSeconds,omitempty"`

	// 指定如何处理job的并发执行。
	// 有效的值是:
	// - "Allow" (默认): 允许 CronJobs 并发执行;
	// - "Forbid":禁止并发执行,如果之前运行的还没有完成,跳过下一次执行;
	// - "Replace": 取消当前正在运行的 job 并用新的 job 替换它
	// +optional
	ConcurrencyPolicy ConcurrencyPolicy `json:"concurrencyPolicy,omitempty"`

	// 此标志告诉控制器暂停后续执行,它不会应用到已经开始执行的 job 。默认值是 false。
	// +optional
	Suspend *bool `json:"suspend,omitempty"`

	// 指定当执行一个 CronJob 时将会被创建的 job 。
	JobTemplate batchv1beta1.JobTemplateSpec `json:"jobTemplate"`

	// +kubebuilder:validation:Minimum=0

	// 要保留的成功完成的 jobs 的数量。
	// 这是一个用来区分明确 0 值和未指定的指针。
	// +optional
	SuccessfulJobsHistoryLimit *int32 `json:"successfulJobsHistoryLimit,omitempty"`

	// +kubebuilder:validation:Minimum=0

	// 要保留的失败的 jobs 的数量。
	// 这是一个用来区分明确 0 值和未指定的指针。
	// +optional
	FailedJobsHistoryLimit *int32 `json:"failedJobsHistoryLimit,omitempty"`
}

// ConcurrencyPolicy 描述 job 将会被怎样处理。仅仅下面并发策略中的一种可以被指定。
// 如果没有指定下面策略的任何一种,那么默认的一个是 AllowConcurrent 。
// +kubebuilder:validation:Enum=Allow;Forbid;Replace
type ConcurrencyPolicy string

const (
	// AllowConcurrent 允许 CronJobs 并发执行.
	AllowConcurrent ConcurrencyPolicy = "Allow"

	// ForbidConcurrent 禁止并发执行, 如果之前运行的还没有完成,跳过下一次执行
	// hasn't finished yet.
	ForbidConcurrent ConcurrencyPolicy = "Forbid"

	// ReplaceConcurrent 取消当前正在运行的 job 并用新的 job 替换它。
	ReplaceConcurrent ConcurrencyPolicy = "Replace"
)

// CronJobStatus 定义了 CronJob 观察的的状态
type CronJobStatus struct {
	// 插入额外的 STATUS 字段 - 定义集群观察的状态
	// 重要:修改了这个文件之后运行"make"去重新生成代码

	// 一个存储当前正在运行 job 的指针列表。
	// +optional
	Active []corev1.ObjectReference `json:"active,omitempty"`

	// 当 job 最后一次成功被调度的信息。
	// +optional
	LastScheduleTime *metav1.Time `json:"lastScheduleTime,omitempty"`
}
因为我们将有多个版本,我们将需要标记一个存储版本。 这是一个 Kubernetes API 服务端使用存储我们数据的版本。 我们将选择v1版本作为我们项目的版本。
我们将用 +kubebuilder:storageversion 去做这件事。
注意如果在存储版本改变之前它们已经被写入那么在仓库中可能存在多个版本 -- 改变存储版本仅仅影响 在改变之后对象的创建/更新。
// +kubebuilder:object:root=true
// +kubebuilder:subresource:status
// +kubebuilder:storageversion

// CronJob 是 cronjobs API 的 Schema
type CronJob struct {
	metav1.TypeMeta   `json:",inline"`
	metav1.ObjectMeta `json:"metadata,omitempty"`

	Spec   CronJobSpec   `json:"spec,omitempty"`
	Status CronJobStatus `json:"status,omitempty"`
}
old stuff
// +kubebuilder:object:root=true

// CronJobList 包含了一个 CronJob 的列表
type CronJobList struct {
	metav1.TypeMeta `json:",inline"`
	metav1.ListMeta `json:"metadata,omitempty"`
	Items           []CronJob `json:"items"`
}

func init() {
	SchemeBuilder.Register(&CronJob{}, &CronJobList{})
}
现在我们已经准备好了类型,接下来需要设置转换。
Hubs, spokes, 和其他的 wheel metaphors
由于我们现在有两个不同的版本,用户可以请求任意一个版本,我们必须定义一种在版本之间进行转换的方法。对于 CRD ,这是通过使用 Webhook 完成的,类似我们在基础中定义 webhooks 教程的默认设置和验证一样。像以前一样,控制器运行时将帮助我们将所有细节都连接在一起,而我们只需实现本身的转换即可。
在执行此操作之前,我们需要了解控制器运行时如何处理版本的。即:
任意两个版本间转换的不足之处
定义转换的一种简单方法可能是定义转换函数如何可以在我们的每个版本之间进行转换。然后,只要我们需要进行转换的时候,我们只需要查找适当的函数,然后调用它就可以执行转换。当我们只有两个版本时,这可以正常工作,但是如果我们有4个版本的时候,或者更多的时候该怎么办?那将会有很多转换功能。
相反,控制器运行时会根据 “hub 和 spoke” 模型-我们将一个版本标记为“hub”,而所有其他版本只需定义为与 hub 之间的来源即可:
如果我们必须在两个 non-hub 之间进行转换,则我们首先要进行转换到这个 hub 对应的版本,然后再转换到我们所需的版本:
这样就减少了我们所需定义转换函数的数量,其实就是在模仿 Kubernetes 内部实际的工作方式。
与 Webhooks 有什么关系?
当 API 客户端(例如 kubectl 或你的控制器)请求特定的版本的资源,Kubernetes API 服务器需要返回该版本的结果。但是,该版本可能不匹配 API 服务器实际存储的版本。
在这种情况下,API 服务器需要知道如何在所需的版本和存储的版本之间进行转换。由于转换不是 CRD 内置的,于是 Kubernetes API 服务器通过调用 Webhook 来执行转换。对于 KubeBuilder ,跟我们上面讨论一样,Webhook 通过控制器运行时来执行 hub-and-spoke 的转换。
现在我们有了向下转换的模型,我们就可以实现转换操作了。
实现转换
采用的转换模型已经就绪,就可以开始实现转换函数了。 我们将这些函数放置在 cronjob_conversion.go 文件中,cronjob_conversion.go 文件和 cronjob_types.go 文件同目录,以避免我们主要的类型文件和额外的方法产生混乱。
Hub...
首先,我们需要实现 hub 接口。我们会选择 v1 版本作为 hub 的一个实现:
Apache License
Licensed under the Apache License, Version 2.0 (the “License”); you may not use this file except in compliance with the License. You may obtain a copy of the License at
http://www.apache.org/licenses/LICENSE-2.0
Unless required by applicable law or agreed to in writing, software distributed under the License is distributed on an “AS IS” BASIS, WITHOUT WARRANTIES OR CONDITIONS OF ANY KIND, either express or implied. See the License for the specific language governing permissions and limitations under the License.
package v1
实现 hub 方法相当容易 -- 我们只需要添加一个叫做 Hub() 的空方法来作为一个 标记。我们也可以将这行代码放到 cronjob_types.go 文件中。
// Hub 标记这个类型是一个用来转换的 hub。
func (*CronJob) Hub() {}
... 然后 Spokes
然后,我们需要实现我们的 spoke 接口,例如 v2 版本:
Apache License
Licensed under the Apache License, Version 2.0 (the “License”); you may not use this file except in compliance with the License. You may obtain a copy of the License at
http://www.apache.org/licenses/LICENSE-2.0
Unless required by applicable law or agreed to in writing, software distributed under the License is distributed on an “AS IS” BASIS, WITHOUT WARRANTIES OR CONDITIONS OF ANY KIND, either express or implied. See the License for the specific language governing permissions and limitations under the License.
package v2
Imports
For imports, we’ll need the controller-runtime
conversion
package, plus the API version for our hub type (v1), and finally some of the
standard packages.
import (
	"fmt"
	"strings"

	"sigs.k8s.io/controller-runtime/pkg/conversion"

	"tutorial.kubebuilder.io/project/api/v1"
)
我们的 “spoke” 版本需要实现
Convertible
接口。顾名思义,它需要实现 ConvertTo 从(其它版本)向 hub 版本转换,ConvertFrom 实现从 hub 版本转换到(其他版本)。
ConvertTo 期望修改其参数以包含转换后的对象。 大部分转换都是直接赋值,除了那些发生变化的 field。
// ConvertTo 转换 CronJob 到 Hub 版本 (v1).
func (src *CronJob) ConvertTo(dstRaw conversion.Hub) error {
	dst := dstRaw.(*v1.CronJob)

	sched := src.Spec.Schedule
	scheduleParts := []string{"*", "*", "*", "*", "*"}
	if sched.Minute != nil {
		scheduleParts[0] = string(*sched.Minute)
	}
	if sched.Hour != nil {
		scheduleParts[1] = string(*sched.Hour)
	}
	if sched.DayOfMonth != nil {
		scheduleParts[2] = string(*sched.DayOfMonth)
	}
	if sched.Month != nil {
		scheduleParts[3] = string(*sched.Month)
	}
	if sched.DayOfWeek != nil {
		scheduleParts[4] = string(*sched.DayOfWeek)
	}
	dst.Spec.Schedule = strings.Join(scheduleParts, " ")
rote conversion
剩下的转换都相当机械。
	// ObjectMeta
	dst.ObjectMeta = src.ObjectMeta

	// Spec
	dst.Spec.StartingDeadlineSeconds = src.Spec.StartingDeadlineSeconds
	dst.Spec.ConcurrencyPolicy = v1.ConcurrencyPolicy(src.Spec.ConcurrencyPolicy)
	dst.Spec.Suspend = src.Spec.Suspend
	dst.Spec.JobTemplate = src.Spec.JobTemplate
	dst.Spec.SuccessfulJobsHistoryLimit = src.Spec.SuccessfulJobsHistoryLimit
	dst.Spec.FailedJobsHistoryLimit = src.Spec.FailedJobsHistoryLimit

	// Status
	dst.Status.Active = src.Status.Active
	dst.Status.LastScheduleTime = src.Status.LastScheduleTime
	return nil
}
ConvertFrom 期望修改其接收者以包含转换后的对象。 大部分转换都是直接赋值,除了那些发生变化的 field。
// ConvertFrom 从 Hub 版本 (v1) 转换到这个版本。
func (dst *CronJob) ConvertFrom(srcRaw conversion.Hub) error {
	src := srcRaw.(*v1.CronJob)

	schedParts := strings.Split(src.Spec.Schedule, " ")
	if len(schedParts) != 5 {
		return fmt.Errorf("invalid schedule: not a standard 5-field schedule")
	}
	partIfNeeded := func(raw string) *CronField {
		if raw == "*" {
			return nil
		}
		part := CronField(raw)
		return &part
	}
	dst.Spec.Schedule.Minute = partIfNeeded(schedParts[0])
	dst.Spec.Schedule.Hour = partIfNeeded(schedParts[1])
	dst.Spec.Schedule.DayOfMonth = partIfNeeded(schedParts[2])
	dst.Spec.Schedule.Month = partIfNeeded(schedParts[3])
	dst.Spec.Schedule.DayOfWeek = partIfNeeded(schedParts[4])
rote conversion
The rest of the conversion is pretty rote.
	// ObjectMeta
	dst.ObjectMeta = src.ObjectMeta

	// Spec
	dst.Spec.StartingDeadlineSeconds = src.Spec.StartingDeadlineSeconds
	dst.Spec.ConcurrencyPolicy = ConcurrencyPolicy(src.Spec.ConcurrencyPolicy)
	dst.Spec.Suspend = src.Spec.Suspend
	dst.Spec.JobTemplate = src.Spec.JobTemplate
	dst.Spec.SuccessfulJobsHistoryLimit = src.Spec.SuccessfulJobsHistoryLimit
	dst.Spec.FailedJobsHistoryLimit = src.Spec.FailedJobsHistoryLimit

	// Status
	dst.Status.Active = src.Status.Active
	dst.Status.LastScheduleTime = src.Status.LastScheduleTime
	return nil
}
现在我们的转换方法已经就绪,我们要做的就是启动我们的 main 方法来运行 webhook。
设置 webhook
我们的 conversion 已经就位,所以接下来就是告诉 controller-runtime 关于我们的 conversion。
通常,我们通过运行
kubebuilder create webhook --group batch --version v1 --kind CronJob --conversion
来搭建起 webhook 设置。然而,当我们已经创建好默认和验证过的 webhook 时,我们就已经设置好 webhook。
Webhook 设置...
Apache License
Copyright 2020 The Kubernetes authors.
Licensed under the Apache License, Version 2.0 (the “License”); you may not use this file except in compliance with the License. You may obtain a copy of the License at
http://www.apache.org/licenses/LICENSE-2.0
Unless required by applicable law or agreed to in writing, software distributed under the License is distributed on an “AS IS” BASIS, WITHOUT WARRANTIES OR CONDITIONS OF ANY KIND, either express or implied. See the License for the specific language governing permissions and limitations under the License.
Go imports
package v1

import (
	"github.com/robfig/cron"
	apierrors "k8s.io/apimachinery/pkg/api/errors"
	"k8s.io/apimachinery/pkg/runtime"
	"k8s.io/apimachinery/pkg/runtime/schema"
	validationutils "k8s.io/apimachinery/pkg/util/validation"
	"k8s.io/apimachinery/pkg/util/validation/field"
	ctrl "sigs.k8s.io/controller-runtime"
	logf "sigs.k8s.io/controller-runtime/pkg/log"
	"sigs.k8s.io/controller-runtime/pkg/webhook"
)
var cronjoblog = logf.Log.WithName("cronjob-resource")
对于 conversion webhook 这项设置达成了两个目标:在我们的类型实现 Hub 和 Convertible 接口的同时,一个 conversion webhook 会被成功注册。
func (r *CronJob) SetupWebhookWithManager(mgr ctrl.Manager) error {
	return ctrl.NewWebhookManagedBy(mgr).
		For(r).
		Complete()
}
Existing Defaulting and Validation
// +kubebuilder:webhook:path=/mutate-batch-tutorial-kubebuilder-io-v1-cronjob,mutating=true,failurePolicy=fail,groups=batch.tutorial.kubebuilder.io,resources=cronjobs,verbs=create;update,versions=v1,name=mcronjob.kb.io

var _ webhook.Defaulter = &CronJob{}

// Default 实现 webhook.Defaulter 使这类型的 webhook 被成功注册
func (r *CronJob) Default() {
	cronjoblog.Info("default", "name", r.Name)

	if r.Spec.ConcurrencyPolicy == "" {
		r.Spec.ConcurrencyPolicy = AllowConcurrent
	}
	if r.Spec.Suspend == nil {
		r.Spec.Suspend = new(bool)
	}
	if r.Spec.SuccessfulJobsHistoryLimit == nil {
		r.Spec.SuccessfulJobsHistoryLimit = new(int32)
		*r.Spec.SuccessfulJobsHistoryLimit = 3
	}
	if r.Spec.FailedJobsHistoryLimit == nil {
		r.Spec.FailedJobsHistoryLimit = new(int32)
		*r.Spec.FailedJobsHistoryLimit = 1
	}
}

// TODO(user): 修改 verbs 为 "verbs=create;update;delete",如果你想允许删除验证。
// +kubebuilder:webhook:verbs=create;update,path=/validate-batch-tutorial-kubebuilder-io-v1-cronjob,mutating=false,failurePolicy=fail,groups=batch.tutorial.kubebuilder.io,resources=cronjobs,versions=v1,name=vcronjob.kb.io

var _ webhook.Validator = &CronJob{}

// ValidateCreate 实现 webhook.Validator 使这类型的 webhook 被成功注册
func (r *CronJob) ValidateCreate() error {
	cronjoblog.Info("validate create", "name", r.Name)

	return r.validateCronJob()
}

// ValidateUpdate 实现 webhook.Validator 使这类型的 webhook 被成功注册
func (r *CronJob) ValidateUpdate(old runtime.Object) error {
	cronjoblog.Info("validate update", "name", r.Name)

	return r.validateCronJob()
}

// ValidateDelete 实现 webhook.Validator 使这类型的 webhook 被成功注册
func (r *CronJob) ValidateDelete() error {
	cronjoblog.Info("validate delete", "name", r.Name)

	// TODO(user): 在对象删除之前填入你的验证逻辑
	return nil
}

func (r *CronJob) validateCronJob() error {
	var allErrs field.ErrorList
	if err := r.validateCronJobName(); err != nil {
		allErrs = append(allErrs, err)
	}
	if err := r.validateCronJobSpec(); err != nil {
		allErrs = append(allErrs, err)
	}
	if len(allErrs) == 0 {
		return nil
	}

	return apierrors.NewInvalid(
		schema.GroupKind{Group: "batch.tutorial.kubebuilder.io", Kind: "CronJob"},
		r.Name, allErrs)
}

func (r *CronJob) validateCronJobSpec() *field.Error {
	// 来自 kubernetes API 的 field 帮助器帮助我们返回友好的
	// 结构化的验证错误。
	return validateScheduleFormat(
		r.Spec.Schedule,
		field.NewPath("spec").Child("schedule"))
}

func validateScheduleFormat(schedule string, fldPath *field.Path) *field.Error {
	if _, err := cron.ParseStandard(schedule); err != nil {
		return field.Invalid(fldPath, schedule, err.Error())
	}
	return nil
}

func (r *CronJob) validateCronJobName() *field.Error {
	if len(r.ObjectMeta.Name) > validationutils.DNS1035LabelMaxLength-11 {
		// 和所有的 Kubernetes 对象一样 job 名称的长度是 63 个字符
		// (它必须适合一个 DNS 子域名)。 当创建一个 job,cronjob 控制器在
		// cronjob 后附加一个 11 个字符的后缀 (`-$TIMESTAMP`) 。
		// job 名称的长度限制是 63 个字符。因此 cronjob
		// 名称的长度必须 <= 63-11=52。如果这里我们不验证,
		// 那么 job 的创建稍后将会失败。
		return field.Invalid(field.NewPath("metadata").Child("name"), r.Name, "must be no more than 52 characters")
	}
	return nil
}
...以及 main.go
同样地,我们的 main 文件也已就绪:
Apache License
Copyright 2020 The Kubernetes authors.
Licensed under the Apache License, Version 2.0 (the “License”); you may not use this file except in compliance with the License. You may obtain a copy of the License at
http://www.apache.org/licenses/LICENSE-2.0
Unless required by applicable law or agreed to in writing, software distributed under the License is distributed on an “AS IS” BASIS, WITHOUT WARRANTIES OR CONDITIONS OF ANY KIND, either express or implied. See the License for the specific language governing permissions and limitations under the License.
Imports
package main

import (
	"flag"
	"os"

	kbatchv1 "k8s.io/api/batch/v1"
	"k8s.io/apimachinery/pkg/runtime"
	utilruntime "k8s.io/apimachinery/pkg/util/runtime"
	clientgoscheme "k8s.io/client-go/kubernetes/scheme"
	_ "k8s.io/client-go/plugin/pkg/client/auth/gcp"
	ctrl "sigs.k8s.io/controller-runtime"
	"sigs.k8s.io/controller-runtime/pkg/log/zap"

	batchv1 "tutorial.kubebuilder.io/project/api/v1"
	batchv2 "tutorial.kubebuilder.io/project/api/v2"
	"tutorial.kubebuilder.io/project/controllers"
	// +kubebuilder:scaffold:imports
)
existing setup
var (
	scheme   = runtime.NewScheme()
	setupLog = ctrl.Log.WithName("setup")
)

func init() {
	utilruntime.Must(clientgoscheme.AddToScheme(scheme))
	_ = kbatchv1.AddToScheme(scheme) // 我们自己添加的
	_ = batchv1.AddToScheme(scheme)
	_ = batchv2.AddToScheme(scheme)
	// +kubebuilder:scaffold:scheme
}
func main() {
existing setup
	var metricsAddr string
	var enableLeaderElection bool
	flag.StringVar(&metricsAddr, "metrics-addr", ":8080", "The address the metric endpoint binds to.")
	flag.BoolVar(&enableLeaderElection, "enable-leader-election", false,
		"Enable leader election for controller manager. "+
			"Enabling this will ensure there is only one active controller manager.")
	flag.Parse()

	ctrl.SetLogger(zap.New(zap.UseDevMode(true)))

	mgr, err := ctrl.NewManager(ctrl.GetConfigOrDie(), ctrl.Options{
		Scheme:             scheme,
		MetricsBindAddress: metricsAddr,
		Port:               9443,
		LeaderElection:     enableLeaderElection,
		LeaderElectionID:   "80807133.tutorial.kubebuilder.io",
	})
	if err != nil {
		setupLog.Error(err, "unable to start manager")
		os.Exit(1)
	}

	if err = (&controllers.CronJobReconciler{
		Client: mgr.GetClient(),
		Log:    ctrl.Log.WithName("controllers").WithName("CronJob"),
		Scheme: mgr.GetScheme(),
	}).SetupWithManager(mgr); err != nil {
		setupLog.Error(err, "unable to create controller", "controller", "CronJob")
		os.Exit(1)
	}
我们现在调用 SetupWebhookWithManager 来注册我们的 conversion webhook 到管理器,如此。
	if err = (&batchv1.CronJob{}).SetupWebhookWithManager(mgr); err != nil {
		setupLog.Error(err, "unable to create webhook", "webhook", "CronJob")
		os.Exit(1)
	}
	if err = (&batchv2.CronJob{}).SetupWebhookWithManager(mgr); err != nil {
		setupLog.Error(err, "unable to create webhook", "webhook", "CronJob")
		os.Exit(1)
	}
	// +kubebuilder:scaffold:builder
existing setup
	setupLog.Info("starting manager")
	if err := mgr.Start(ctrl.SetupSignalHandler()); err != nil {
		setupLog.Error(err, "problem running manager")
		os.Exit(1)
	}
}
所有都已经设置准备好!接下来要做的只有测试我们的 webhook。
部署和测试
在测试版本转换之前,我们需要在 CRD 中启用转换:
Kubebuilder 在 config 目录下生成禁用 webhook bits 的 Kubernetes 清单。要启用它们,我们需要:
-
在
config/crd/kustomization.yaml文件启用patches/webhook_in_<kind>.yaml和patches/cainjection_in_<kind>.yaml。 -
在
config/default/kustomization.yaml文件的bases部分下启用../certmanager和../webhook目录。 -
在
config/default/kustomization.yaml文件的patches部分下启用manager_webhook_patch.yaml。 -
在
config/default/kustomization.yaml文件的CERTMANAGER部分下启用所有变量。
此外,我们需要将 CRD_OPTIONS 变量设置为 "crd",删除 trivialVersions 选项(这确保我们实际
为每个版本生成验证,而不是告诉 Kubernetes 它们是一样的):
CRD_OPTIONS ?= "crd"
现在,我们已经完成了所有的代码更改和清单,让我们将其部署到集群并对其进行测试。
你需要安装 cert-manager(0.9.0+ 版本),
除非你有其他证书管理解决方案。Kubebuilder 团队已在
0.9.0-alpha.0
版本中测试了本教程中的指令。
一旦所有的证书准备妥当后, 我们就可以运行 make install deploy(和平常一样)将所有的 bits(CRD,
controller-manager deployment)部署到集群上。
测试
一旦启用了转换的所有 bits 都在群集上运行,我们就可以通过请求不同的版本来测试转换。
我们将基于 v1 版本制作 v2 版本(将其放在 config/samples 下)
apiVersion: batch.tutorial.kubebuilder.io/v2
kind: CronJob
metadata:
  name: cronjob-sample
spec:
  schedule:
    minute: "*/1"
  startingDeadlineSeconds: 60
  concurrencyPolicy: Allow # explicitly specify, but Allow is also default.
  jobTemplate:
    spec:
      template:
        spec:
          containers:
          - name: hello
            image: busybox
            args:
            - /bin/sh
            - -c
            - date; echo Hello from the Kubernetes cluster
          restartPolicy: OnFailure
然后,我们可以在集群中创建它:
kubectl apply -f config/samples/batch_v2_cronjob.yaml
如果我们正确地完成了所有操作,那么它应该能够成功地创建,并且我们能够使用 v2 资源来获取它
kubectl get cronjobs.v2.batch.tutorial.kubebuilder.io -o yaml
apiVersion: batch.tutorial.kubebuilder.io/v2
kind: CronJob
metadata:
  name: cronjob-sample
spec:
  schedule:
    minute: "*/1"
  startingDeadlineSeconds: 60
  concurrencyPolicy: Allow # explicitly specify, but Allow is also default.
  jobTemplate:
    spec:
      template:
        spec:
          containers:
          - name: hello
            image: busybox
            args:
            - /bin/sh
            - -c
            - date; echo Hello from the Kubernetes cluster
          restartPolicy: OnFailure
v1 资源
kubectl get cronjobs.v1.batch.tutorial.kubebuilder.io -o yaml
apiVersion: batch.tutorial.kubebuilder.io/v1
kind: CronJob
metadata:
  name: cronjob-sample
spec:
  schedule: "*/1 * * * *"
  startingDeadlineSeconds: 60
  concurrencyPolicy: Allow # explicitly specify, but Allow is also default.
  jobTemplate:
    spec:
      template:
        spec:
          containers:
          - name: hello
            image: busybox
            args:
            - /bin/sh
            - -c
            - date; echo Hello from the Kubernetes cluster
          restartPolicy: OnFailure
两者都应填写,并分别看起来等同于的 v2 和 v1 示例。注意,每个都有不同的 API 版本。
最后,如果稍等片刻,我们应该注意到,即使我们的控制器是根据 v1 API 版本编写的,我们的 CronJob 仍在继续协调。
故障排除
迁移
Kubebuilder 项目结构之间的迁移通常会涉及到一些手动操作。
这部分将详细说明,在 Kubebuilder 自动生成的不同版本之间迁移或向更复杂的项目层级结构迁移时所需具备的条件。
Kubebuilder v1 版本 VS v2 版本
这篇文档涵盖了从 v1 版本迁移到 v2 版本时所有破坏性的变化。
所有细节变化(破坏性的或者其他)可以查询 controller-runtime, controller-tools 和 kubebuilder 发布说明。
常规变化
V2 版本项目中使用 go modules。但是 kubebuilder 会继续支持 dep 直到 go 1.13 正式发布。
controller-runtime
-
Client.List现在使用 functional options (List(ctx, list, ...option)) 代替List(ctx, ListOptions, list)。 -
Client接口加入了Client.DeleteAllOf。 -
默认开启 Metrics。
-
pkg/runtime下的一些包已经被移除,它们旧的位置已被弃用。并将会在 controller-runtime v1.0.0 版本之前删除。更多信息请看 godocs。
Webhook-related
-
webhooks 的自动证书生成已经被移除,并且它将不再自动注册。使用 controller-tools 去生成 webhook 配置。如果你需要生成证书,我们推荐使用 cert-manager。Kubebuilder v2 版本将会自动生成证书管理器配置供你使用 -- 更多细节请看 Webhook 教程。
-
builder包现在为 controllers 和 webhooks 提供了独立的生成器,这便于选择哪个去运行。
controller-tools
在 v2 版本中已经重写了生成器框架。在许多情况下,它仍然像以前一样工作,但是要注意有一些破坏性的变化。更多细节请看 marker 文档。
Kubebuilder
-
Kubebuilder v2 版本引入了简化的项目布局。你可以在 这里 找到相关设计文档。
-
在 v1 版本中,manager 作为一个
StatefulSet部署,而在 v2 版本中是作为一个Deployment部署。 -
kubebuilder create webhook命令被用来自动生成 mutating/validating/conversion webhooks. 它代替了kubebuilder alpha webhook命令。 -
v2 版本使用
distroless/static代替 Ubuntu 作为基础镜像。这减少了镜像大小和受攻击面。 -
v2 版本要求 kustomize v3.1.0+。
从 v1 版本迁移到 v2 版本
在继续后续操作之前要确保你了解Kubebuilder v1 版本和 v2 版本之间的不同。
请确保你根据安装指导安装了迁移所需的组件。
迁移 v1 项目的推荐方法是创建一个新的 v2 项目,然后将 API 和 reconciliation 代码拷贝过来。 这种转换就像一个原生的 v2 项目。然后,在某些情况下,是可以进行就地升级的(比如,复用 v1 项目 的层级结构,升级 controller-runtime 和 controller-tools)。
让我们来看一个[v1 项目例子][v1-project]并且将其迁移至 Kubebuilder v2。最后,我们会有一些 东西看起来像v2 项目例子。
准备
我们将需要明确 group,vresion,kind 和 domain 都是什么。
让我们看看我们目前的 v1 项目的结构:
pkg/
├── apis
│   ├── addtoscheme_batch_v1.go
│   ├── apis.go
│   └── batch
│       ├── group.go
│       └── v1
│           ├── cronjob_types.go
│           ├── cronjob_types_test.go
│           ├── doc.go
│           ├── register.go
│           ├── v1_suite_test.go
│           └── zz_generated.deepcopy.go
├── controller
└── webhook
我们所有的 API 信息都存放在 pkg/apis/batch 目录下,因此我们可以在那儿查找以
获取我们需要知道的东西。
在 cronjob_types.go 中,我们可以找到
type CronJob struct {...}
在 register.go 中,我们可以找到
SchemeGroupVersion = schema.GroupVersion{Group: "batch.tutorial.kubebuilder.io", Version: "v1"}
把这些集合起来,我们能够得到 kind 是 CronJob,group-version 是 batch.tutorial.kubebuilder.io/v1。
初始化一个 v2 项目
现在,我们需要初始化一个 v2 项目。然而,在此之前,如果在 gopath 中我们没有找到 go 模块,
那么我们需要初始化一个新的 go 模块。
go mod init tutorial.kubebuilder.io/project
接下来,我们可以用 kubebuilder 来完成项目的初始化:
kubebuilder init --domain tutorial.kubebuilder.io
迁移 APIs 和 Controllers
接下来,我们将重新生成 API 类型和 controllers。因为两者我们都需要,当向我们询问 我们想要生成哪些部分时,我们需要输入 yes 来同时生成 API 和 controller。
kubebuilder create api --group batch --version v1 --kind CronJob
如果你在使用多 group,迁移的时候就需要一些手动工作了。更多详细信息可以 查看这个。
迁移 APIs
现在,让我们把 API 的定义部分从 pkg/apis/batch/v1/cronjob_types.go 拷贝
至 api/v1/cronjob_types.go。我们仅仅需要拷贝 Spec 和 Status 字段的实现部分。
我们可以用 +kubebuilder:object:root=true 来替代 +k8s:deepcopy-gen:interfaces=... 标记
(这个在Kubebuilder 中废弃了)。
我们不再需要以下的标记了(他们不再被使用,是 KubeBuilder 一些老版本的遗留产物)。
// +genclient
// +k8s:openapi-gen=true
我们的 API 类型看起来应该像下面这样:
// +kubebuilder:object:root=true
// +kubebuilder:subresource:status
// CronJob is the Schema for the cronjobs API
type CronJob struct {...}

// +kubebuilder:object:root=true

// CronJobList contains a list of CronJob
type CronJobList struct {...}
迁移 Controllers
现在,让我们将 controller reconciler 的代码从 pkg/controller/cronjob/cronjob_controller.go
迁移至 controllers/cronjob_controller.go。
我们需要拷贝
ReconcileCronJob结构体中的字段到CronJobReconciler。Reconcile函数的内容。- rbac 相关标记到一个新文件。
func add(mgr manager.Manager, r reconcile.Reconciler) error下的代码 到func SetupWithManager。
迁移 Webhooks
如果你还没有webhook,你可以跳过此章节。
Core 类型和外部 CRDs 的 Webhooks
如果你在使用 Kubernetes core 类型(比如 Pods),或者不属于你的一个外部 CRD 的 webhooks, 你可以参考内置类型的 controller-runtime 例子,然后做一些类似的事情。 Kubebuilder 不会为这种情形生成太多,但是你可以用 controller-runtime 中的一些库。
为我们的 CRDs 自动生成 Webhooks
现在让我们为我们的 CRD (CronJob) 自动生成 webhooks。我们需要运行以下命令并指定 --defaulting
和 --programmatic-validation 参数(因为我们的测试项目使用 defaulting 和 validating webhooks):
kubebuilder create webhook --group batch --version v1 --kind CronJob --defaulting --programmatic-validation
取决于有多少 CRDs 需要 webhooks,我们或许需要为不同的 Group-Version-Kinds 多次执行上述的命令。
现在,我们需要为每一个 webhook 来拷贝逻辑。对于 validating webhooks,我们需要将
pkg/default_server/cronjob/validating/cronjob_create_handler.go 文件中 func validatingCronJobFn
内容拷贝至 api/v1/cronjob_webhook.go 文件中的 func ValidateCreate,对于 update 来说也是一样的。
类似的,我们将 func mutatingCronJobFn 拷贝至 func Default。
Webhook 标记
当自动生成 webhooks 时,Kubebuilder v2 添加了以下标记:
// 这些是 v2 标记

// 这些是关于 mutating webhook 的
// +kubebuilder:webhook:path=/mutate-batch-tutorial-kubebuilder-io-v1-cronjob,mutating=true,failurePolicy=fail,groups=batch.tutorial.kubebuilder.io,resources=cronjobs,verbs=create;update,versions=v1,name=mcronjob.kb.io

...

// 这些是关于 validating webhook 的
// +kubebuilder:webhook:path=/validate-batch-tutorial-kubebuilder-io-v1-cronjob,mutating=false,failurePolicy=fail,groups=batch.tutorial.kubebuilder.io,resources=cronjobs,verbs=create;update,versions=v1,name=vcronjob.kb.io
默认的 verbs 是 verbs=create;update。我们需要确保 verbs 和我们所需要的是一致的。
比如,如果我们仅仅想验证 creation,那么我们就需要将 verbs 改成 verbs=create。
我们也需要确保 failure-policy 是不变的。
如下所示的标记将不再被使用(因为他们和自部署证书配置有关,这些在 v2 被移除了):
// v1 markers
// +kubebuilder:webhook:port=9876,cert-dir=/tmp/cert
// +kubebuilder:webhook:service=test-system:webhook-service,selector=app:webhook-server
// +kubebuilder:webhook:secret=test-system:webhook-server-secret
// +kubebuilder:webhook:mutating-webhook-config-name=test-mutating-webhook-cfg
// +kubebuilder:webhook:validating-webhook-config-name=test-validating-webhook-cfg
在 v1 中,一个单个的 webhook 标记可能会被拆分成多个段落。但是在 v2 中,每一个 webhook 必须由一个单个的标记来表示。
其他
v1 中如果对 main.go 有任何手动更新,我们需要将修改同步至新的 main.go 中。我们还
需要确保所有需要的 schemes 已经被注册了。
如果在 config 目录下有一些额外的清单被添加进来,同样需要做同步。
如果需要的话在 Makefile 中修改镜像名字。
验证
最后,我们可以运行 make 和 make docker-build 来确保一些都运行正常。
Kubebuilder v2 vs v3
迁移指南
Single Group to Multi-Group
尽管默认情况下 KubeBuilder v2 不会在同一存储库中搭建与多个 API 组兼容的项目结构,但可以修改默认项目结构以支持它。
让我们迁移下CronJob 示例。
通常,我们使用 API 组的前缀作为目录名称。 查看 api/v1/groupversion_info.go,我们可以看到:
// +groupName=batch.tutorial.kubebuilder.io
package v1
为了让 api 结构更清晰,我们将 api 重命名为 apis,并将现有的 API 移动到新的子目录 batch 中:
mkdir apis/batch
mv api/* apis/batch
# 确保所有文件都成功移动后,删除旧目录 `api`
rm -rf api/
将 API 移至新目录后,控制器也需要做相同的处理:
mkdir controllers/batch
mv controllers/* controllers/batch/
接下来,我们将需要更新所有对旧软件包名称的引用。
对于 CronJob,我们需要更新 main.go 和 controllers/batch/cronjob_controller.go。
如果你已经在项目中添加了其他文件,那么也需要更新这些文件中的引用。
最后,我们将运行在项目中启用 Multi-group 模式的命令:
kubebuilder edit --multigroup=true
执行 kubebuilder edit --multigroup=true 命令后,KubeBuilder 将会在 PROJECT 中新增一行,标记该项目是一个 Multi-group 项目:
version: "2"
domain: tutorial.kubebuilder.io
repo: tutorial.kubebuilder.io/project
multigroup: true
请注意,multigroup: true 表示这是一个 Multi-group 项目。
通过上述操作将项目标记为 Multi-group 项目后,原本已经实现的 API 仍旧保持原来的目录结构。该命令并不会自动帮你做调整。
请注意,在 Multi-group 项目中,Kind API 的文件被生成在 apis/<group>/<version>,而不是在 api/<version>。
另外,请注意控制器将在 controllers/<group> 目录下创建,而不是在 controllers。
这就是为什么我们在前面的步骤中使用脚本移动之前生成的 API。
请记住,之后要更新引用。
CronJob教程更详细地解释了每个更改(在 KubeBuilder 为 Single-group 项目生成这些更改的上下文中)。
参考
-
使用 Finalizers Finalizers 是一种在资源被从 Kubernetes 集群删除之前,对资源执行的任何与资源相关的自定义逻辑的机制。
-
什么是 webhook? Webhooks 是一种 HTTP 回调,在 k8s 中有三种 webhooks:1)准入 webhook 2)CRD 转换 webhook 3)授权 webhook
- 准入 webhook 准入 webhooks 是对 mutating 和 validating 资源在准入 API server 之前的 HTTP 回调。
生成 CRD
KubeBuilder 使用一个叫做 controller-gen 的工具来生成工具代码和 Kubernetes 的 YAML 对象,比如 CustomResourceDefinitions。
为了实现这种方式,它使用一种特殊的 “标记注释”(以 // + 开头)来表示这里要插入字段,类型和包相关的信息。如果是 CRD,那么这些信息通常是从以 _types.go 结尾的文件中产生的。更多关于标记的信息,可以看标记相关文档。
KubeBuilder 提供了提供了一个 make 的命令来运行 controller-gen 并生成 CRD:make manifests。
当运行 make manifests 的时候,在 config/crd/bases 目录下可以看到生成的 CRD。make manifests 可以生成许多其它的文件 -- 更多详情请查看标记相关文档。
验证
CRD 支持使用 OpenAPI v3 schema 在 validation 段中进行声明式验证。
通常,验证标记可能会关联到字段或者类型。如果你定义了复杂的验证,或者如果你需要重复使用验证,亦或者你需要验证切片元素,那么通常你最好定义一个新的类型来描述你的验证。
例如:
type ToySpec struct {
	// +kubebuilder:validation:MaxLength=15
	// +kubebuilder:validation:MinLength=1
	Name string `json:"name,omitempty"`

	// +kubebuilder:validation:MaxItems=500
	// +kubebuilder:validation:MinItems=1
	// +kubebuilder:validation:UniqueItems=true
	Knights []string `json:"knights,omitempty"`

	Alias   Alias   `json:"alias,omitempty"`
	Rank    Rank    `json:"rank"`
}

// +kubebuilder:validation:Enum=Lion;Wolf;Dragon
type Alias string

// +kubebuilder:validation:Minimum=1
// +kubebuilder:validation:Maximum=3
// +kubebuilder:validation:ExclusiveMaximum=false
type Rank int32
打印其它信息列
从 Kubernetes 1.11 开始,kubectl get 可以询问 Kubernetes 服务要展示哪些列。对于 CRD 来说,可以用 kubectl get 来提供展示有用的特定类型的信息,类似于为内置类型提供的信息。
你 CRD 的 [additionalPrinterColumns 字段][kube-additional-printer-columns] 控制了要展示的信息,它是通过在给 CRD 的 Go 类型上标注 +kubebuilder:printcolumn 标签来控制要展示的信息。
比如下面的验证例子,我们添加字段来显示 knights,rank 和 alias 字段的信息
// +kubebuilder:printcolumn:name="Alias",type=string,JSONPath=`.spec.alias`
// +kubebuilder:printcolumn:name="Rank",type=integer,JSONPath=`.spec.rank`
// +kubebuilder:printcolumn:name="Bravely Run Away",type=boolean,JSONPath=`.spec.knights[?(@ == "Sir Robin")]`,description="when danger rears its ugly head, he bravely turned his tail and fled",priority=10
// +kubebuilder:printcolumn:name="Age",type="date",JSONPath=".metadata.creationTimestamp"
type Toy struct {
	metav1.TypeMeta   `json:",inline"`
	metav1.ObjectMeta `json:"metadata,omitempty"`

	Spec   ToySpec   `json:"spec,omitempty"`
	Status ToyStatus `json:"status,omitempty"`
}
子资源
在 Kubernetes 1.13 中 CRD 可以选择实现 /status 和 /scale 这类子资源。
通常推荐你在所有资源上实现 /status 子资源的时候,要有一个状态字段。
两个子资源都有对应的[标签][crd markers]。
状态
通过 +kubebuilder:subresource:status 设置子资源的状态。当时启用状态时,更新主资源不会修改它的状态。类似的,更新子资源状态也只是修改了状态字段。
例如:
// +kubebuilder:subresource:status
type Toy struct {
	metav1.TypeMeta   `json:",inline"`
	metav1.ObjectMeta `json:"metadata,omitempty"`

	Spec   ToySpec   `json:"spec,omitempty"`
	Status ToyStatus `json:"status,omitempty"`
}
扩缩容
子资源的伸缩可以通过 +kubebuilder:subresource:scale 来启用。启用后,用户可以使用 kubectl scale 来对你的资源进行扩容或者缩容。如果 selectorpath 参数被指定为字符串形式的标签选择器,HorizontalPodAutoscaler 将可以自动扩容你的资源。
例如:
type CustomSetSpec struct {
	Replicas *int32 `json:"replicas"`
}

type CustomSetStatus struct {
	Replicas int32 `json:"replicas"`
    Selector string `json:"selector"` // this must be the string form of the selector
}


// +kubebuilder:subresource:status
// +kubebuilder:subresource:scale:specpath=.spec.replicas,statuspath=.status.replicas,selectorpath=.status.selector
type CustomSet struct {
	metav1.TypeMeta   `json:",inline"`
	metav1.ObjectMeta `json:"metadata,omitempty"`

	Spec   CustomSetSpec   `json:"spec,omitempty"`
	Status CustomSetStatus `json:"status,omitempty"`
}
多版本
Kubernetes 1.13,你可以在你的 CRD 的同一个 Kind 中定义多个版本,并且使用一个 webhook 对它们进行互转。
更多这部分相关的信息,请看多版本教程。
默认情况下,KubeBuilder 会禁止为你的 CRD 的不同版本产生不同的验证,这都是为了兼容老版本的 Kubernetes。
如果需要,你要通过修改 makefile 中的命令:把 CRD_OPTIONS ?= "crd:trivialVersions=true 修改为 CRD_OPTIONS ?= crd。
这样,你就可以使用 +kubebuilder:storageversion 标签 来告知 GVK 这个字段应该被 API 服务来存储数据。
写在最后
KubeBuilder 会制定规则来运行 controller-gen。如果 controller-gen 不在 go get 用来下载 Go 模块的路径下的时候,这些规则会自动的安装 controller-gen。
如果你想知道它到底做了什么,你也可以直接运行 controller-gen。
每一个 controller-gen “生成器” 都由 controller-gen 的一个参数选项控制,和标签的语法一样。比如,要生成带有 “trivial versions” 的 CRD(无版本转换的 webhook),我们可以执行 controller-gen crd:trivialVersions=true paths=./api/...。
controller-gen 也支持不同的输出“规则”,以此来控制如何及输出到哪里。注意 manifests 生成规则(是只生成 CRD 的简短写法):
# 生成 CRD 清单
manifests: controller-gen
	$(CONTROLLER_GEN) crd:trivialVersions=true paths="./..." output:crd:artifacts:config=config/crd/bases
它使用了 output:crd:artifacts 输出规则来表示 CRD 关联的配置(非代码)应该在 config/crd/bases 目录下,而不是在 config/crd 下。
运行如下命令可以看到 controller-gen 的所有支持参数:
$ controller-gen -h
或者,可以执行以下命令,获取更多详细信息:
$ controller-gen -hhh
使用 Finalizers
Finalizers 允许控制器实现异步预删除挂钩。假设你为 API 类型的每个对象创建了一个外部资源(例如存储桶),并且想要从 Kubernetes 中删除对象同时删除关联的外部资源,则可以使用 finalizers 来实现。
您可以在Kubernetes参考文档中阅读有关 finalizers 的更多信息。以下部分演示了如何在控制器的 Reconcile 方法中注册和触发预删除挂钩。
要注意的关键点是 finalizers 使对象上的“删除”成为设置删除时间戳的“更新”。对象上存在删除时间戳记表明该对象正在被删除。否则,在没有 finalizers 的情况下,删除将显示为协调,缓存中缺少该对象。
注意:
- 如果未删除对象并且未注册 finalizers ,则添加 finalizers 并在 Kubernetes 中更新对象。
- 如果要删除对象,但 finalizers 列表中仍存在 finalizers ,请执行预删除逻辑并移除 finalizers 并更新对象。
- 确保预删除逻辑是幂等的。
Apache License
Licensed under the Apache License, Version 2.0 (the “License”); you may not use this file except in compliance with the License. You may obtain a copy of the License at
http://www.apache.org/licenses/LICENSE-2.0
Unless required by applicable law or agreed to in writing, software distributed under the License is distributed on an “AS IS” BASIS, WITHOUT WARRANTIES OR CONDITIONS OF ANY KIND, either express or implied. See the License for the specific language governing permissions and limitations under the License.
Imports
First, we start out with some standard imports. As before, we need the core controller-runtime library, as well as the client package, and the package for our API types.
package controllers

import (
	"context"

	"github.com/go-logr/logr"
	ctrl "sigs.k8s.io/controller-runtime"
	"sigs.k8s.io/controller-runtime/pkg/client"

	batchv1 "tutorial.kubebuilder.io/project/api/v1"
)
The code snippet below shows skeleton code for implementing a finalizer.
func (r *CronJobReconciler) Reconcile(req ctrl.Request) (ctrl.Result, error) {
	ctx := context.Background()
	log := r.Log.WithValues("cronjob", req.NamespacedName)

	var cronJob *batchv1.CronJob
	if err := r.Get(ctx, req.NamespacedName, cronJob); err != nil {
		log.Error(err, "unable to fetch CronJob")
		// 在我们删除一个不存在的对象的时,我们会遇到not-found errors这样的报错
	        // 我们将暂时忽略,因为不能通过重新加入队列的方式来修复这些错误
	        //(我们需要等待新的通知),而且我们可以根据删除的请求来获取它们
		return ctrl.Result{}, client.IgnoreNotFound(err)
	}

	// 自定义 finalizer 的名字
	myFinalizerName := "storage.finalizers.tutorial.kubebuilder.io"

	// 检查 DeletionTimestamp 以确定对象是否在删除中
	if cronJob.ObjectMeta.DeletionTimestamp.IsZero() {
		// 如果当前对象没有 finalizer, 说明其没有处于正被删除的状态。
		// 接着让我们添加 finalizer 并更新对象,相当于注册我们的 finalizer。
		if !containsString(cronJob.ObjectMeta.Finalizers, myFinalizerName) {
			cronJob.ObjectMeta.Finalizers = append(cronJob.ObjectMeta.Finalizers, myFinalizerName)
			if err := r.Update(context.Background(), cronJob); err != nil {
				return ctrl.Result{}, err
			}
		}
	} else {
		// 这个对象将要被删除
		if containsString(cronJob.ObjectMeta.Finalizers, myFinalizerName) {
			// 我们的 finalizer 就在这, 接下来就是处理外部依赖
			if err := r.deleteExternalResources(cronJob); err != nil {
				// 如果无法在此处删除外部依赖项,则返回错误
				// 以便可以重试
				return ctrl.Result{}, err
			}
			// 从列表中删除我们的 finalizer 并进行更新。
			cronJob.ObjectMeta.Finalizers = removeString(cronJob.ObjectMeta.Finalizers, myFinalizerName)
			if err := r.Update(context.Background(), cronJob); err != nil {
				return ctrl.Result{}, err
			}
		}

		// 当它们被删除的时候停止 reconciliation
		return ctrl.Result{}, nil
	}

	// Your reconcile logic

	return ctrl.Result{}, nil
}

func (r *Reconciler) deleteExternalResources(cronJob *batch.CronJob) error {

	// 删除与 cronJob 相关的任何外部资源
	// 确保删除是幂等性操作且可以安全调用同一对象多次。
}

// 辅助函数用于检查并从字符串切片中删除字符串。
func containsString(slice []string, s string) bool {
	for _, item := range slice {
		if item == s {
			return true
		}
	}
	return false
}

func removeString(slice []string, s string) (result []string) {
	for _, item := range slice {
		if item == s {
			continue
		}
		result = append(result, item)
	}
	return
}
Kind 集群
这篇文章只涉及到使用一个 kind 集群的基础。你可以在 kind 文档 中找到更详细的介绍。
安装
你可以按照这个文档来安装 kind。
创建一个集群
你可以简单的通过下面的命令来创建一个 kind 集群。
kind create cluster
要定制你的集群,你可以提供额外的配置。比如,下面的例子是一个 kind 配置的例子。
{{#include ../cronjob-tutorial/testdata/project/hack/kind-config.yaml}}
使用上面的配置来运行下面的命令会创建一个 k8s v1.17.2 的集群,包含了 1 个 master 节点和 3 个 worker 节点。
kind create cluster --config hack/kind-config.yaml --image=kindest/node:v1.17.2
你可以使用 --image 标记来指定你想创建集群的版本,比如:--image=kindest/node:v1.17.2,能支持的版本在这里。
加载 Docker 镜像到集群
当使用一个本地 kind 集群进行开发时,加载 docker 镜像到集群中是一个非常有用的功能。可以让你避免使用容器仓库。
kind load docker-image your-image-name:your-tag
删除一个集群
- 删除一个 kind 集群
kind delete cluster
Webhook
Webhooks 是一种以阻塞方式发送的信息请求。实现 webhooks 的 web 应用程序将在特定事件发生时向其他应用程序发送 HTTP 请求。
在 kubernetes 中,有下面三种 webhook:admission webhook, authorization webhook 和 CRD conversion webhook。
在 controller-runtime 库中,我们支持 admission webhooks 和 CRD conversion webhooks。
Kubernetes 在 1.9 版本中(该特性进入 beta 版时)支持这些动态 admission webhooks。
Kubernetes 在 1.15 版本(该特性进入 beta 版时)支持 conversion webhook。
准入 Webhooks
准入 webhook 是 HTTP 的回调,它可以接受准入请求,处理它们并且返回准入响应。
Kubernetes 提供了下面几种类型的准入 webhook:
-
变更准入 Webhook 这种类型的 webhook 会在对象创建或是更新且没有存储前改变操作对象,然后才存储。它可以用于资源请求中的默认字段,比如在 Deployment 中没有被用户制定的字段。它可以用于注入 sidecar 容器。
-
验证准入 Webhook 这种类型的 webhook 会在对象创建或是更新且没有存储前验证操作对象,然后才存储。它可以有比纯基于 schema 验证更加复杂的验证。比如:交叉字段验证和 pod 镜像白名单。
默认情况下 apiserver 自己没有对 webhook 进行认证。然而,如果你想认证客户端,你可以配置 apiserver 使用基本授权,持有 token,或者证书对 webhook 进行认证。 详细的步骤可以查看这里。
核心类型的准入 Webhook
为 CRD 构建准入 webhook 非常容易,这在 CronJob 教程中已经介绍过了。由于 kubebuilder 不支持核心类型的 webhook 自动生成,您必须使用 controller-runtime 的库来处理它。这里可以参考 controller-runtime 的一个 示例。
建议使用 kubebuilder 初始化一个项目,然后按照下面的步骤为核心类型添加准入 webhook。
实现处理程序
你需要用自己的处理程序去实现 admission.Handler 接口。
type podAnnotator struct {
	Client  client.Client
	decoder *admission.Decoder
}

func (a *podAnnotator) Handle(ctx context.Context, req admission.Request) admission.Response {
	pod := &corev1.Pod{}
	err := a.decoder.Decode(req, pod)
	if err != nil {
		return admission.Errored(http.StatusBadRequest, err)
	}

	//在 pod 中修改字段

	marshaledPod, err := json.Marshal(pod)
	if err != nil {
		return admission.Errored(http.StatusInternalServerError, err)
	}
	return admission.PatchResponseFromRaw(req.Object.Raw, marshaledPod)
}
如果需要客户端,只需在结构构建时传入客户端。
如果你为你的处理程序添加了 InjectDecoder 方法,将会注入一个解码器。
func (a *podAnnotator) InjectDecoder(d *admission.Decoder) error {
	a.decoder = d
	return nil
}
注意: 为了使得 controller-gen 能够为你生成 webhook 配置,你需要添加一些标记。例如,
// +kubebuilder:webhook:path=/mutate-v1-pod,mutating=true,failurePolicy=fail,groups="",resources=pods,verbs=create;update,versions=v1,name=mpod.kb.io
更新 main.go
现在你需要在 webhook 服务端中注册你的处理程序。
mgr.GetWebhookServer().Register("/mutate-v1-pod", &webhook.Admission{Handler: &podAnnotator{Client: mgr.GetClient()}})
您需要确保这里的路径与标记中的路径相匹配。
部署
部署它就像为 CRD 部署 webhook 服务端一样。你需要
- 提供服务证书
- 部署服务端
你可以参考 教程。
Config/Code 生成标记
Kubebuilder 利用一个叫做controller-gen的工具来生成公共的代码和 Kubernetes YAML 文件。 这些代码和配置的生成是由 Go 代码中特殊存在的“标记注释”来控制的。
标记都是以加号开头的单行注释,后面跟着一个标记名称,而跟随的关于标记的特定配置则是可选的。
// +kubebuilder:validation:Optional
// +kubebuilder:validation:MaxItems=2
// +kubebuilder:printcolumn:JSONPath=".status.replicas",name=Replicas,type=string
关于不同类型的代码和 YAML 生成可以查看每一小节来获取详细信息。
在 KubeBuilder 中生成代码 & 制品
Kubebuilder 项目有两个 make 命令用到了 controller-gen:
-
make manifests用来生成 Kubernetes 对象的 YAML 文件,像CustomResourceDefinitions,WebhookConfigurations 和 RBAC roles。 -
make generate用来生成代码,像runtime.Object/DeepCopy implementations。
查看[生成 CRDs]来获取综合描述。
标记语法
准确的语法在godocs for controller-tools有描述。
通常,标记可以是:
-
Empty (
+kubebuilder:validation:Optional):空标记像命令行中的布尔标记位-- 仅仅是指定他们来开启某些行为。 -
Anonymous (
+kubebuilder:validation:MaxItems=2):匿名标记使用单个值作为参数。 -
Multi-option (
+kubebuilder:printcolumn:JSONPath=".status.replicas",name=Replicas,type=string):多选项标记使用一个或多个命名参数。第一个参数与名称之间用冒号隔开,而后面的参数使用逗号隔开。参数的顺序没有关系。有些参数是可选的。
Marker arguments may be strings, ints, bools, slices, or maps thereof. Strings, ints, and bools follow their Go syntax:
标记的参数可以是字符,整数,布尔,切片,或者 map 类型。 字符,整数,和布尔都应该符合 Go 语法:
// +kubebuilder:validation:ExclusiveMaximum=false
// +kubebuilder:validation:Format="date-time"
// +kubebuilder:validation:Maximum=42
为了方便,在简单的例子中字符的引号可以被忽略,尽管这种做法在任何时候都是不被鼓励使用的,即便是单个字符:
// +kubebuilder:validation:Type=string
切片可以用大括号和逗号分隔来指定。
// +kubebuilder:webhooks:Enum={"crackers, Gromit, we forgot the crackers!","not even wensleydale?"}
或者,在简单的例子中,用分号来隔开。
// +kubebuilder:validation:Enum=Wallace;Gromit;Chicken
Maps 是用字符类型的键和任意类型的值(有效地map[string]interface{})来指定的。一个 map 是由大括号({})包围起来的,每一个键和每一个值是用冒号(:)隔开的,每一个键值对是由逗号隔开的。
// +kubebuilder:validation:Default={magic: {numero: 42, stringified: forty-two}}
CRD 生成
这些标记描述了如何从一系列 Go 类型和包中构建出一个 CRD。而验证标记则描述了实际验证模式的生成。
从 生成 CRDs 查看示例。
- groupName
- string
specifies the API group name for this package.
- string
- kubebuilder:printcolumn
- JSONPath
- string
- description
- string
- format
- string
- name
- string
- priority
- int
- type
- string
adds a column to "kubectl get" output for this CRD.
- JSONPath
- string
specifies the jsonpath expression used to extract the value of the column.
- description
- string
specifies the help/description for this column.
- format
- string
specifies the format of the column.
It may be any OpenAPI data format corresponding to the type, listed at https://github.com/OAI/OpenAPI-Specification/blob/master/versions/2.0.md#data-types.
- name
- string
specifies the name of the column.
- priority
- int
indicates how important it is that this column be displayed.
Lower priority (higher numbered) columns will be hidden if the terminal width is too small.
- type
- string
indicates the type of the column.
It may be any OpenAPI data type listed at https://github.com/OAI/OpenAPI-Specification/blob/master/versions/2.0.md#data-types.
- kubebuilder:resource
- categories
- string
- path
- string
- scope
- string
- shortName
- string
- singular
- string
configures naming and scope for a CRD.
- categories
- string
specifies which group aliases this resource is part of.
Group aliases are used to work with groups of resources at once. The most common one is “all“ which covers about a third of the base resources in Kubernetes, and is generally used for “user-facing“ resources.
- path
- string
specifies the plural "resource" for this CRD.
It generally corresponds to a plural, lower-cased version of the Kind. See https://book.kubebuilder.io/cronjob-tutorial/gvks.html.
- scope
- string
overrides the scope of the CRD (Cluster vs Namespaced).
Scope defaults to “Namespaced“. Cluster-scoped (“Cluster“) resources don‘t exist in namespaces.
- shortName
- string
specifies aliases for this CRD.
Short names are often used when people have work with your resource over and over again. For instance, “rs“ for “replicaset“ or “crd“ for customresourcedefinition.
- singular
- string
overrides the singular form of your resource.
The singular form is otherwise defaulted off the plural (path).
- kubebuilder:skip
don't consider this package as an API version.
- kubebuilder:skipversion
removes the particular version of the CRD from the CRDs spec.
This is useful if you need to skip generating and listing version entries for ‘internal‘ resource versions, which typically exist if using the Kubernetes upstream conversion-gen tool.
- kubebuilder:storageversion
marks this version as the "storage version" for the CRD for conversion.
When conversion is enabled for a CRD (i.e. it‘s not a trivial-versions/single-version CRD), one version is set as the “storage version“ to be stored in etcd. Attempting to store any other version will result in conversion to the storage version via a conversion webhook.
- kubebuilder:subresource:scale
- selectorpath
- string
- specpath
- string
- statuspath
- string
enables the "/scale" subresource on a CRD.
- selectorpath
- string
specifies the jsonpath to the pod label selector field for the scale's status.
The selector field must be the string form (serialized form) of a selector. Setting a pod label selector is necessary for your type to work with the HorizontalPodAutoscaler.
- specpath
- string
specifies the jsonpath to the replicas field for the scale's spec.
- statuspath
- string
specifies the jsonpath to the replicas field for the scale's status.
- kubebuilder:subresource:status
enables the "/status" subresource on a CRD.
- kubebuilder:unservedversion
does not serve this version.
This is useful if you need to drop support for a version in favor of a newer version.
- versionName
- string
overrides the API group version for this package (defaults to the package name).
- string
CRD Validation
These markers modify how the CRD validation schema is produced for the types and fields they modify. Each corresponds roughly to an OpenAPI/JSON schema option. 这些标记修改了如何为其修改的类型和字段生成 CRD 验证框架。每个标记大致对应一个 OpenAPI/JSON 模式选项。
有关示例,请参见生成 CRDs。
- kubebuilder:default
- any
sets the default value for this field.
A default value will be accepted as any value valid for the field. Formatting for common types include: boolean:
true, string:Cluster, numerical:1.24, array:{1,2}, object:{policy: "delete"}). Defaults should be defined in pruned form, and only best-effort validation will be performed. Full validation of a default requires submission of the containing CRD to an apiserver.- any
- kubebuilder:validation:EmbeddedResource
EmbeddedResource marks a fields as an embedded resource with apiVersion, kind and metadata fields.
An embedded resource is a value that has apiVersion, kind and metadata fields. They are validated implicitly according to the semantics of the currently running apiserver. It is not necessary to add any additional schema for these field, yet it is possible. This can be combined with PreserveUnknownFields.
- kubebuilder:validation:Enum
- any
specifies that this (scalar) field is restricted to the *exact* values specified here.
- any
- kubebuilder:validation:Enum
- any
specifies that this (scalar) field is restricted to the *exact* values specified here.
- any
- kubebuilder:validation:ExclusiveMaximum
- bool
indicates that the maximum is "up to" but not including that value.
- bool
- kubebuilder:validation:ExclusiveMaximum
- bool
indicates that the maximum is "up to" but not including that value.
- bool
- kubebuilder:validation:ExclusiveMinimum
- bool
indicates that the minimum is "up to" but not including that value.
- bool
- kubebuilder:validation:ExclusiveMinimum
- bool
indicates that the minimum is "up to" but not including that value.
- bool
- kubebuilder:validation:Format
- string
specifies additional "complex" formatting for this field.
For example, a date-time field would be marked as “type: string“ and “format: date-time“.
- string
- kubebuilder:validation:Format
- string
specifies additional "complex" formatting for this field.
For example, a date-time field would be marked as “type: string“ and “format: date-time“.
- string
- kubebuilder:validation:MaxItems
- int
specifies the maximum length for this list.
- int
- kubebuilder:validation:MaxItems
- int
specifies the maximum length for this list.
- int
- kubebuilder:validation:MaxLength
- int
specifies the maximum length for this string.
- int
- kubebuilder:validation:MaxLength
- int
specifies the maximum length for this string.
- int
- kubebuilder:validation:Maximum
- int
specifies the maximum numeric value that this field can have.
- int
- kubebuilder:validation:Maximum
- int
specifies the maximum numeric value that this field can have.
- int
- kubebuilder:validation:MinItems
- int
specifies the minimun length for this list.
- int
- kubebuilder:validation:MinItems
- int
specifies the minimun length for this list.
- int
- kubebuilder:validation:MinLength
- int
specifies the minimum length for this string.
- int
- kubebuilder:validation:MinLength
- int
specifies the minimum length for this string.
- int
- kubebuilder:validation:Minimum
- int
specifies the minimum numeric value that this field can have.
- int
- kubebuilder:validation:Minimum
- int
specifies the minimum numeric value that this field can have.
- int
- kubebuilder:validation:MultipleOf
- int
specifies that this field must have a numeric value that's a multiple of this one.
- int
- kubebuilder:validation:MultipleOf
- int
specifies that this field must have a numeric value that's a multiple of this one.
- int
- kubebuilder:validation:Optional
specifies that this field is optional, if fields are required by default.
- kubebuilder:validation:Optional
specifies that all fields in this package are optional by default.
- kubebuilder:validation:Pattern
- string
specifies that this string must match the given regular expression.
- string
- kubebuilder:validation:Pattern
- string
specifies that this string must match the given regular expression.
- string
- kubebuilder:validation:Required
specifies that all fields in this package are required by default.
- kubebuilder:validation:Required
specifies that this field is required, if fields are optional by default.
- kubebuilder:validation:Type
- string
overrides the type for this field (which defaults to the equivalent of the Go type).
This generally must be paired with custom serialization. For example, the metav1.Time field would be marked as “type: string“ and “format: date-time“.
- string
- kubebuilder:validation:Type
- string
overrides the type for this field (which defaults to the equivalent of the Go type).
This generally must be paired with custom serialization. For example, the metav1.Time field would be marked as “type: string“ and “format: date-time“.
- string
- kubebuilder:validation:UniqueItems
- bool
specifies that all items in this list must be unique.
- bool
- kubebuilder:validation:UniqueItems
- bool
specifies that all items in this list must be unique.
- bool
- kubebuilder:validation:XEmbeddedResource
EmbeddedResource marks a fields as an embedded resource with apiVersion, kind and metadata fields.
An embedded resource is a value that has apiVersion, kind and metadata fields. They are validated implicitly according to the semantics of the currently running apiserver. It is not necessary to add any additional schema for these field, yet it is possible. This can be combined with PreserveUnknownFields.
- nullable
marks this field as allowing the "null" value.
This is often not necessary, but may be helpful with custom serialization.
- optional
specifies that this field is optional, if fields are required by default.
CRD 处理
当你有自定义资源请求时,这些标记有助于 Kubernetes API 服务器控制处理 API。
作为例子可查看章节生成 CRDs.
- kubebuilder:pruning:PreserveUnknownFields
PreserveUnknownFields stops the apiserver from pruning fields which are not specified.
By default the apiserver drops unknown fields from the request payload during the decoding step. This marker stops the API server from doing so. It affects fields recursively, but switches back to normal pruning behaviour if nested properties or additionalProperties are specified in the schema. This can either be true or undefined. False is forbidden.
- kubebuilder:validation:XPreserveUnknownFields
PreserveUnknownFields stops the apiserver from pruning fields which are not specified.
By default the apiserver drops unknown fields from the request payload during the decoding step. This marker stops the API server from doing so. It affects fields recursively, but switches back to normal pruning behaviour if nested properties or additionalProperties are specified in the schema. This can either be true or undefined. False is forbidden.
- listMapKey
- string
specifies the keys to map listTypes.
It indicates the index of a map list. They can be repeated if multiple keys must be used. It can only be used when ListType is set to map, and the keys should be scalar types.
- string
- listType
- string
specifies the type of data-structure that the list represents (map, set, atomic).
Possible data-structure types of a list are:
- “map“: it needs to have a key field, which will be used to build an associative list. A typical example is a the pod container list, which is indexed by the container name.
- “set“: Fields need to be “scalar“, and there can be only one occurrence of each.
- “atomic“: All the fields in the list are treated as a single value, are typically manipulated together by the same actor.
- string
- mapType
- string
specifies the level of atomicity of the map; i.e. whether each item in the map is independent of the others, or all fields are treated as a single unit.
Possible values:
- “granular“: items in the map are independent of each other, and can be manipulated by different actors. This is the default behavior.
- “atomic“: all fields are treated as one unit. Any changes have to replace the entire map.
- string
- structType
- string
specifies the level of atomicity of the struct; i.e. whether each field in the struct is independent of the others, or all fields are treated as a single unit.
Possible values:
- “granular“: fields in the struct are independent of each other, and can be manipulated by different actors. This is the default behavior.
- “atomic“: all fields are treated as one unit. Any changes have to replace the entire struct.
- string
Webhook
这些标记描述了webhook配置如何生成。 使用这些使你的 webhook 描述与实现它们的代码保持一致。
- kubebuilder:webhook
- failurePolicy
- string
- groups
- string
- matchPolicy
- string
- mutating
- bool
- name
- string
- path
- string
- resources
- string
- sideEffects
- string
- verbs
- string
- versions
- string
specifies how a webhook should be served.
It specifies only the details that are intrinsic to the application serving it (e.g. the resources it can handle, or the path it serves on).
- failurePolicy
- string
specifies what should happen if the API server cannot reach the webhook.
It may be either “ignore“ (to skip the webhook and continue on) or “fail“ (to reject the object in question).
- groups
- string
specifies the API groups that this webhook receives requests for.
- matchPolicy
- string
defines how the "rules" list is used to match incoming requests. Allowed values are "Exact" (match only if it exactly matches the specified rule) or "Equivalent" (match a request if it modifies a resource listed in rules, even via another API group or version).
- mutating
- bool
marks this as a mutating webhook (it's validating only if false)
Mutating webhooks are allowed to change the object in their response, and are called before all validating webhooks. Mutating webhooks may choose to reject an object, similarly to a validating webhook.
- name
- string
indicates the name of this webhook configuration. Should be a domain with at least three segments separated by dots
- path
- string
specifies that path that the API server should connect to this webhook on. Must be prefixed with a '/validate-' or '/mutate-' depending on the type, and followed by $GROUP-$VERSION-$KIND where all values are lower-cased and the periods in the group are substituted for hyphens. For example, a validating webhook path for type batch.tutorial.kubebuilder.io/v1,Kind=CronJob would be /validate-batch-tutorial-kubebuilder-io-v1-cronjob
- resources
- string
specifies the API resources that this webhook receives requests for.
- sideEffects
- string
specify whether calling the webhook will have side effects. This has an impact on dry runs and `kubectl diff`: if the sideEffect is "Unknown" (the default) or "Some", then the API server will not call the webhook on a dry-run request and fails instead. If the value is "None", then the webhook has no side effects and the API server will call it on dry-run. If the value is "NoneOnDryRun", then the webhook is responsible for inspecting the "dryRun" property of the AdmissionReview sent in the request, and avoiding side effects if that value is "true."
- verbs
- string
specifies the Kubernetes API verbs that this webhook receives requests for.
Only modification-like verbs may be specified. May be “create“, “update“, “delete“, “connect“, or “*“ (for all).
- versions
- string
specifies the API versions that this webhook receives requests for.
Object/DeepCopy
这些标记控制何时生成 DeepCopy 和 runtime.Object 实现方法。
- k8s:deepcopy-gen
- raw
enables or disables object interface & deepcopy implementation generation for this package
- raw
- k8s:deepcopy-gen
- raw
overrides enabling or disabling deepcopy generation for this type
- raw
- k8s:deepcopy-gen:interfaces
- string
enables object interface implementation generation for this type
- string
- kubebuilder:object:generate
- bool
enables or disables object interface & deepcopy implementation generation for this package
- bool
- kubebuilder:object:generate
- bool
overrides enabling or disabling deepcopy generation for this type
- bool
- kubebuilder:object:root
- bool
enables object interface implementation generation for this type
- bool
RBAC
这些标签会导致生成一个 RBAC 的 ClusterRole。这可以让您描述控制器所需要的权限,以及使用这些权限的代码。
- kubebuilder:rbac
- groups
- string
- namespace
- string
- resourceNames
- string
- resources
- string
- urls
- string
- verbs
- string
specifies an RBAC rule to all access to some resources or non-resource URLs.
- groups
- string
specifies the API groups that this rule encompasses.
- namespace
- string
specifies the scope of the Rule. If not set, the Rule belongs to the generated ClusterRole. If set, the Rule belongs to a Role, whose namespace is specified by this field.
- resourceNames
- string
specifies the names of the API resources that this rule encompasses.
Create requests cannot be restricted by resourcename, as the object‘s name is not known at authorization time.
- resources
- string
specifies the API resources that this rule encompasses.
- urls
- string
URL specifies the non-resource URLs that this rule encompasses.
- verbs
- string
specifies the (lowercase) kubernetes API verbs that this rule encompasses.
controller-gen CLI
KubeBuilder 使用了一个称为 controller-gen 用于生成通用代码和 Kubernetes YAML。 代码和配置的生成规则是被 Go 代码中的一些特殊标记注释控制的。
controller-gen 由不同的“generators”(指定生成什么)和“输出规则”(指定如何以及在何处输出结果)。
两者都是通过指定的命令行参数配置的,更详细的说明见 标记格式化。
例如,
controller-gen paths=./... crd:trivialVersions=true rbac:roleName=controller-perms output:crd:artifacts:config=config/crd/bases
生成的 CRD 和 RBAC YAML 文件默认存储在config/crd/bases目录。
RBAC 规则默认输出到(config/rbac)。 主要考虑到当前目录结构中的每个包的关系。
(按照 go ... 的通配符规则)。
生成器
每个不同的生成器都是通过 CLI 选项配置的。controller-gen 一次运行也可以指定多个生成器。
- webhook
generates (partial) {Mutating,Validating}WebhookConfiguration objects.
- schemapatch
- manifests
- string
- maxDescLen
- int
patches existing CRDs with new schemata.
For legacy (v1beta1) single-version CRDs, it will simply replace the global schema. For legacy (v1beta1) multi-version CRDs, and any v1 CRDs, it will replace schemata of existing versions and clear the schema from any versions not specified in the Go code. It will not add new versions, or remove old ones. For legacy multi-version CRDs with identical schemata, it will take care of lifting the per-version schema up to the global schema. It will generate output for each “CRD Version“ (API version of the CRD type itself) , e.g. apiextensions/v1beta1 and apiextensions/v1) available.
- manifests
- string
contains the CustomResourceDefinition YAML files.
- maxDescLen
- int
specifies the maximum description length for fields in CRD's OpenAPI schema.
0 indicates drop the description for all fields completely. n indicates limit the description to at most n characters and truncate the description to closest sentence boundary if it exceeds n characters.
- rbac
- roleName
- string
generates ClusterRole objects.
- roleName
- string
sets the name of the generated ClusterRole.
- object
- headerFile
- string
- year
- string
generates code containing DeepCopy, DeepCopyInto, and DeepCopyObject method implementations.
- headerFile
- string
specifies the header text (e.g. license) to prepend to generated files.
- year
- string
specifies the year to substitute for " YEAR" in the header file.
- crd
- crdVersions
- string
- maxDescLen
- int
- preserveUnknownFields
- bool
- trivialVersions
- bool
generates CustomResourceDefinition objects.
- crdVersions
- string
specifies the target API versions of the CRD type itself to generate. Defaults to v1beta1.
The first version listed will be assumed to be the “default“ version and will not get a version suffix in the output filename. You‘ll need to use “v1“ to get support for features like defaulting, along with an API server that supports it (Kubernetes 1.16+).
- maxDescLen
- int
specifies the maximum description length for fields in CRD's OpenAPI schema.
0 indicates drop the description for all fields completely. n indicates limit the description to at most n characters and truncate the description to closest sentence boundary if it exceeds n characters.
- preserveUnknownFields
- bool
indicates whether or not we should turn off pruning.
Left unspecified, it‘ll default to true when only a v1beta1 CRD is generated (to preserve compatibility with older versions of this tool), or false otherwise. It‘s required to be false for v1 CRDs.
- trivialVersions
- bool
indicates that we should produce a single-version CRD.
Single “trivial-version“ CRDs are compatible with older (pre 1.13) Kubernetes API servers. The storage version‘s schema will be used as the CRD‘s schema. Only works with the v1beta1 CRD version.
输出规则
输出规则配置给定生成器如何输出其结果。 默认是一个全局 fallback 输出规则(指定为 output:<rule>),
另外还有 per-generator 的规则(指定为output:<generator>:<rule>),会覆盖掉 fallback 规则。
为简便起见,每个生成器的输出规则(output:<generator>:<rule>)默认省略。 相当于这里列出的全局备用选项。
- output:artifacts
- code
- string
- config
- string
outputs artifacts to different locations, depending on whether they're package-associated or not.
Non-package associated artifacts are output to the Config directory, while package-associated ones are output to their package‘s source files‘ directory, unless an alternate path is specified in Code.
- code
- string
overrides the directory in which to write new code (defaults to where the existing code lives).
- config
- string
points to the directory to which to write configuration.
- output:dir
- string
outputs each artifact to the given directory, regardless of if it's package-associated or not.
- string
- output:none
skips outputting anything.
- output:stdout
outputs everything to standard-out, with no separation.
Generally useful for single-artifact outputs.
其他选项
- paths
- string
represents paths and go-style path patterns to use as package roots.
- string
开启 shell 自动补全
Kubebuilder 的 Bash 补全脚本可以通过命令 kubebuilder completion bash 来自动生成,Kubebuilder 的 Zsh 补全脚本可以通过命令 kubebuilder completion zsh 来自动生成。需要注意的是在你的 shell 环境中用 source 运行一下补全脚本就会开启 Kubebuilder 自动补全。
-
一旦安装完成,要在
/etc/shells中添加路径/usr/local/bin/bash。echo “/usr/local/bin/bash” > /etc/shells -
确保使用当前用户安装的 shell。
chsh -s /usr/local/bin/bash -
在 /.bash_profile 或 ~/.bashrc 中添加以下内容:
# kubebuilder autocompletion
if [ -f /usr/local/share/bash-completion/bash_completion ]; then
. /usr/local/share/bash-completion/bash_completion
fi
. <(kubebuilder completion)
- 重启终端以便让修改生效。
制品
除了主要的二进制版本外 Kubebuilder 还发布测试二进制文件和容器镜像。
测试二进制文件
你可以在 https://go.kubebuilder.io/test-tools 中找到所有的测试二进制文件。
你可以在 https://go.kubebuilder.io/test-tools/${version}/${os}/${arch} 找到单独的二进制文件。
容器镜像
你可以在 https://go.kubebuilder.io/images/${os} 或者 gcr.io/kubebuilder/thirdparty-${os} 中找到与你系统相对应的所有容器镜像。
你可以在 https://go.kubebuilder.io/images/${os}/${version} 或者 gcr.io/kubebuilder/thirdparty-${os}:${version} 中找到单独的容器镜像。
在集成测试中使用 envtest
controller-runtime 提供 envtest (godoc),这个包可以帮助你为你在 etcd 和 Kubernetes API server 中设置并启动的 controllers 实例来写集成测试,不需要 kubelet,controller-manager 或者其他组件。
可以根据以下通用流程在集成测试中使用 envtest:
import sigs.k8s.io/controller-runtime/pkg/envtest

//指定 testEnv 配置
testEnv = &envtest.Environment{
	CRDDirectoryPaths: []string{filepath.Join("..", "config", "crd", "bases")},
}

//启动 testEnv
cfg, err = testEnv.Start()

//编写测试逻辑

//停止 testEnv
err = testEnv.Stop()
kubebuilder 为你提供了 testEnv 的设置和清除模版,在生成的 /controllers 目录下的 ginkgo 测试套件中。
测试运行中的 Logs 以 test-env 为前缀。
配置你的测试控制面
你可以在你的集成测试中使用环境变量和/或者标记位来指定 api-server 和 etcd 设置。
环境变量
| 变量名称 | 类型 | 使用时机 |
|---|---|---|
USE_EXISTING_CLUSTER | boolean | 可以指向一个已存在 cluster 的控制面,而不用设置一个本地的控制面。 |
KUBEBUILDER_ASSETS | 目录路径 | 将集成测试指向一个包含所有二进制文件(api-server,etcd 和 kubectl)的目录。 |
TEST_ASSET_KUBE_APISERVER, TEST_ASSET_ETCD, TEST_ASSET_KUBECTL | 分别代表 api-server,etcd,和 kubectl 二进制文件的路径 | 和 KUBEBUILDER_ASSETS 相似,但是更细一点。指示集成测试使用非默认的二进制文件。这些环境变量也可以被用来确保特定的测试是在期望版本的二进制文件下运行的。 |
KUBEBUILDER_CONTROLPLANE_START_TIMEOUT 和 KUBEBUILDER_CONTROLPLANE_STOP_TIMEOUT | time.ParseDuration 支持的持续时间的格式 | 指定不同于测试控制面(分别)启动和停止的超时时间;任何超出设置的测试都会运行失败。 |
KUBEBUILDER_ATTACH_CONTROL_PLANE_OUTPUT | boolean | 设置为 true 可以将控制面的标准输出和标准错误贴合到 os.Stdout 和 os.Stderr 上。这种做法在调试测试失败时是非常有用的,因为输出包含控制面的输出。 |
标记位
下面是一个在你的集成测试中通过修改标记位来启动 API server 的例子,和 envtest.DefaultKubeAPIServerFlags 中的默认值相对比:
var _ = BeforeSuite(func(done Done) {
	Expect(os.Setenv("TEST_ASSET_KUBE_APISERVER", "../testbin/bin/kube-apiserver")).To(Succeed())
	Expect(os.Setenv("TEST_ASSET_ETCD", "../testbin/bin/etcd")).To(Succeed())
	Expect(os.Setenv("TEST_ASSET_KUBECTL", "../testbin/bin/kubectl")).To(Succeed())

	logf.SetLogger(zap.New(zap.WriteTo(GinkgoWriter), zap.UseDevMode(true)))
	testenv = &envtest.Environment{}

	_, err := testenv.Start()
	Expect(err).NotTo(HaveOccurred())

	close(done)
}, 60)

var _ = AfterSuite(func() {
	Expect(testenv.Stop()).To(Succeed())

	Expect(os.Unsetenv("TEST_ASSET_KUBE_APISERVER")).To(Succeed())
	Expect(os.Unsetenv("TEST_ASSET_ETCD")).To(Succeed())
	Expect(os.Unsetenv("TEST_ASSET_KUBECTL")).To(Succeed())

})
customApiServerFlags := []string{
	"--secure-port=6884",
	"--admission-control=MutatingAdmissionWebhook",
}

apiServerFlags := append([]string(nil), envtest.DefaultKubeAPIServerFlags...)
apiServerFlags = append(apiServerFlags, customApiServerFlags...)

testEnv = &envtest.Environment{
	CRDDirectoryPaths: []string{filepath.Join("..", "config", "crd", "bases")},
	KubeAPIServerFlags: apiServerFlags,
}
测试注意事项
除非你在使用一个已存在的 cluster,否则需要记住在测试内容中没有内置的 controllers 在运行。在某些方面,测试控制面会表现的和“真实” clusters 有点不一样,这可能会对你如何写测试有些影响。一个很常见的例子就是垃圾回收;因为没有 controllers 来监控内置的资源,对象是不会被删除的,即使设置了 OwnerReference。
为了测试删除生命周期是否工作正常,要测试所有权而不是仅仅判断是否存在。比如:
expectedOwnerReference := v1.OwnerReference{
	Kind:       "MyCoolCustomResource",
	APIVersion: "my.api.example.com/v1beta1",
	UID:        "d9607e19-f88f-11e6-a518-42010a800195",
	Name:       "userSpecifiedResourceName",
}
Expect(deployment.ObjectMeta.OwnerReferences).To(ContainElement(expectedOwnerReference))
指标
默认情况下,controller-runtime 会构建一个全局 prometheus 注册,并且会为每个控制器发布一系列性能指标。
指标保护
如果使用了 kubebuilder kube-auth-proxy 默认会保护这些指标。Kubebuilder v2.2.0+ 会创建一个集群角色,它在 config/rbac/auth_proxy_client_clusterrole.yaml 文件中配置。
你需要给你所有的 Prometheus 服务授权,以便它可以拿到这些被保护的指标。为实现授权,你可以创建一个 clusterRoleBinding 把 clusterRole 绑定到一个你的 Prometheus 服务使用的账户上。
可以运行下面的 kubectl 命令来创建它。如果你使用 kubebuilder,在config/default/kustomization.yaml 文件中 namePrefix 字段是 <project-prefix>。
kubectl create clusterrolebinding metrics --clusterrole=<project-prefix>-metrics-reader --serviceaccount=<namespace>:<service-account-name>
给 Prometheus 导出指标
按照下面的步骤来用 Prometheus Operator 导出指标:
- 安装 Prometheus 和 Prometheus Operator。如果没有自己的监控系统,在生产环境上我们推荐使用 kube-prometheus。如果你只是做实验,那么可以只安装 Prometheus 和 Prometheus Operator。
- 在
config/default/kustomization.yaml配置文件中取消- ../prometheus这一行的注释。它会创建可以导出指标的ServiceMonitor资源。
# [PROMETHEUS] 用于启用 prometheus 监控, 取消所有带 'PROMETHEUS' 部分的注释。
- ../prometheus
注意,当你在集群中安装你的项目时,它会创建一个 ServiceMonitor 来导出指标。为了检查 ServiceMonitor,可以运行 kubectl get ServiceMonitor -n <project>-system。看下面的例子:
$ kubectl get ServiceMonitor -n monitor-system
NAME                                         AGE
monitor-controller-manager-metrics-monitor   2m8s
同样,要注意默认情况下是通过 8443 端口导出指标的。这种情况下,你可以在自己的 dashboard 中检查 Prometheus metrics。要检查这些指标,在项目运行的 {namespace="<project>-system"} 命名空间下搜索导出的指标。看下面的例子:
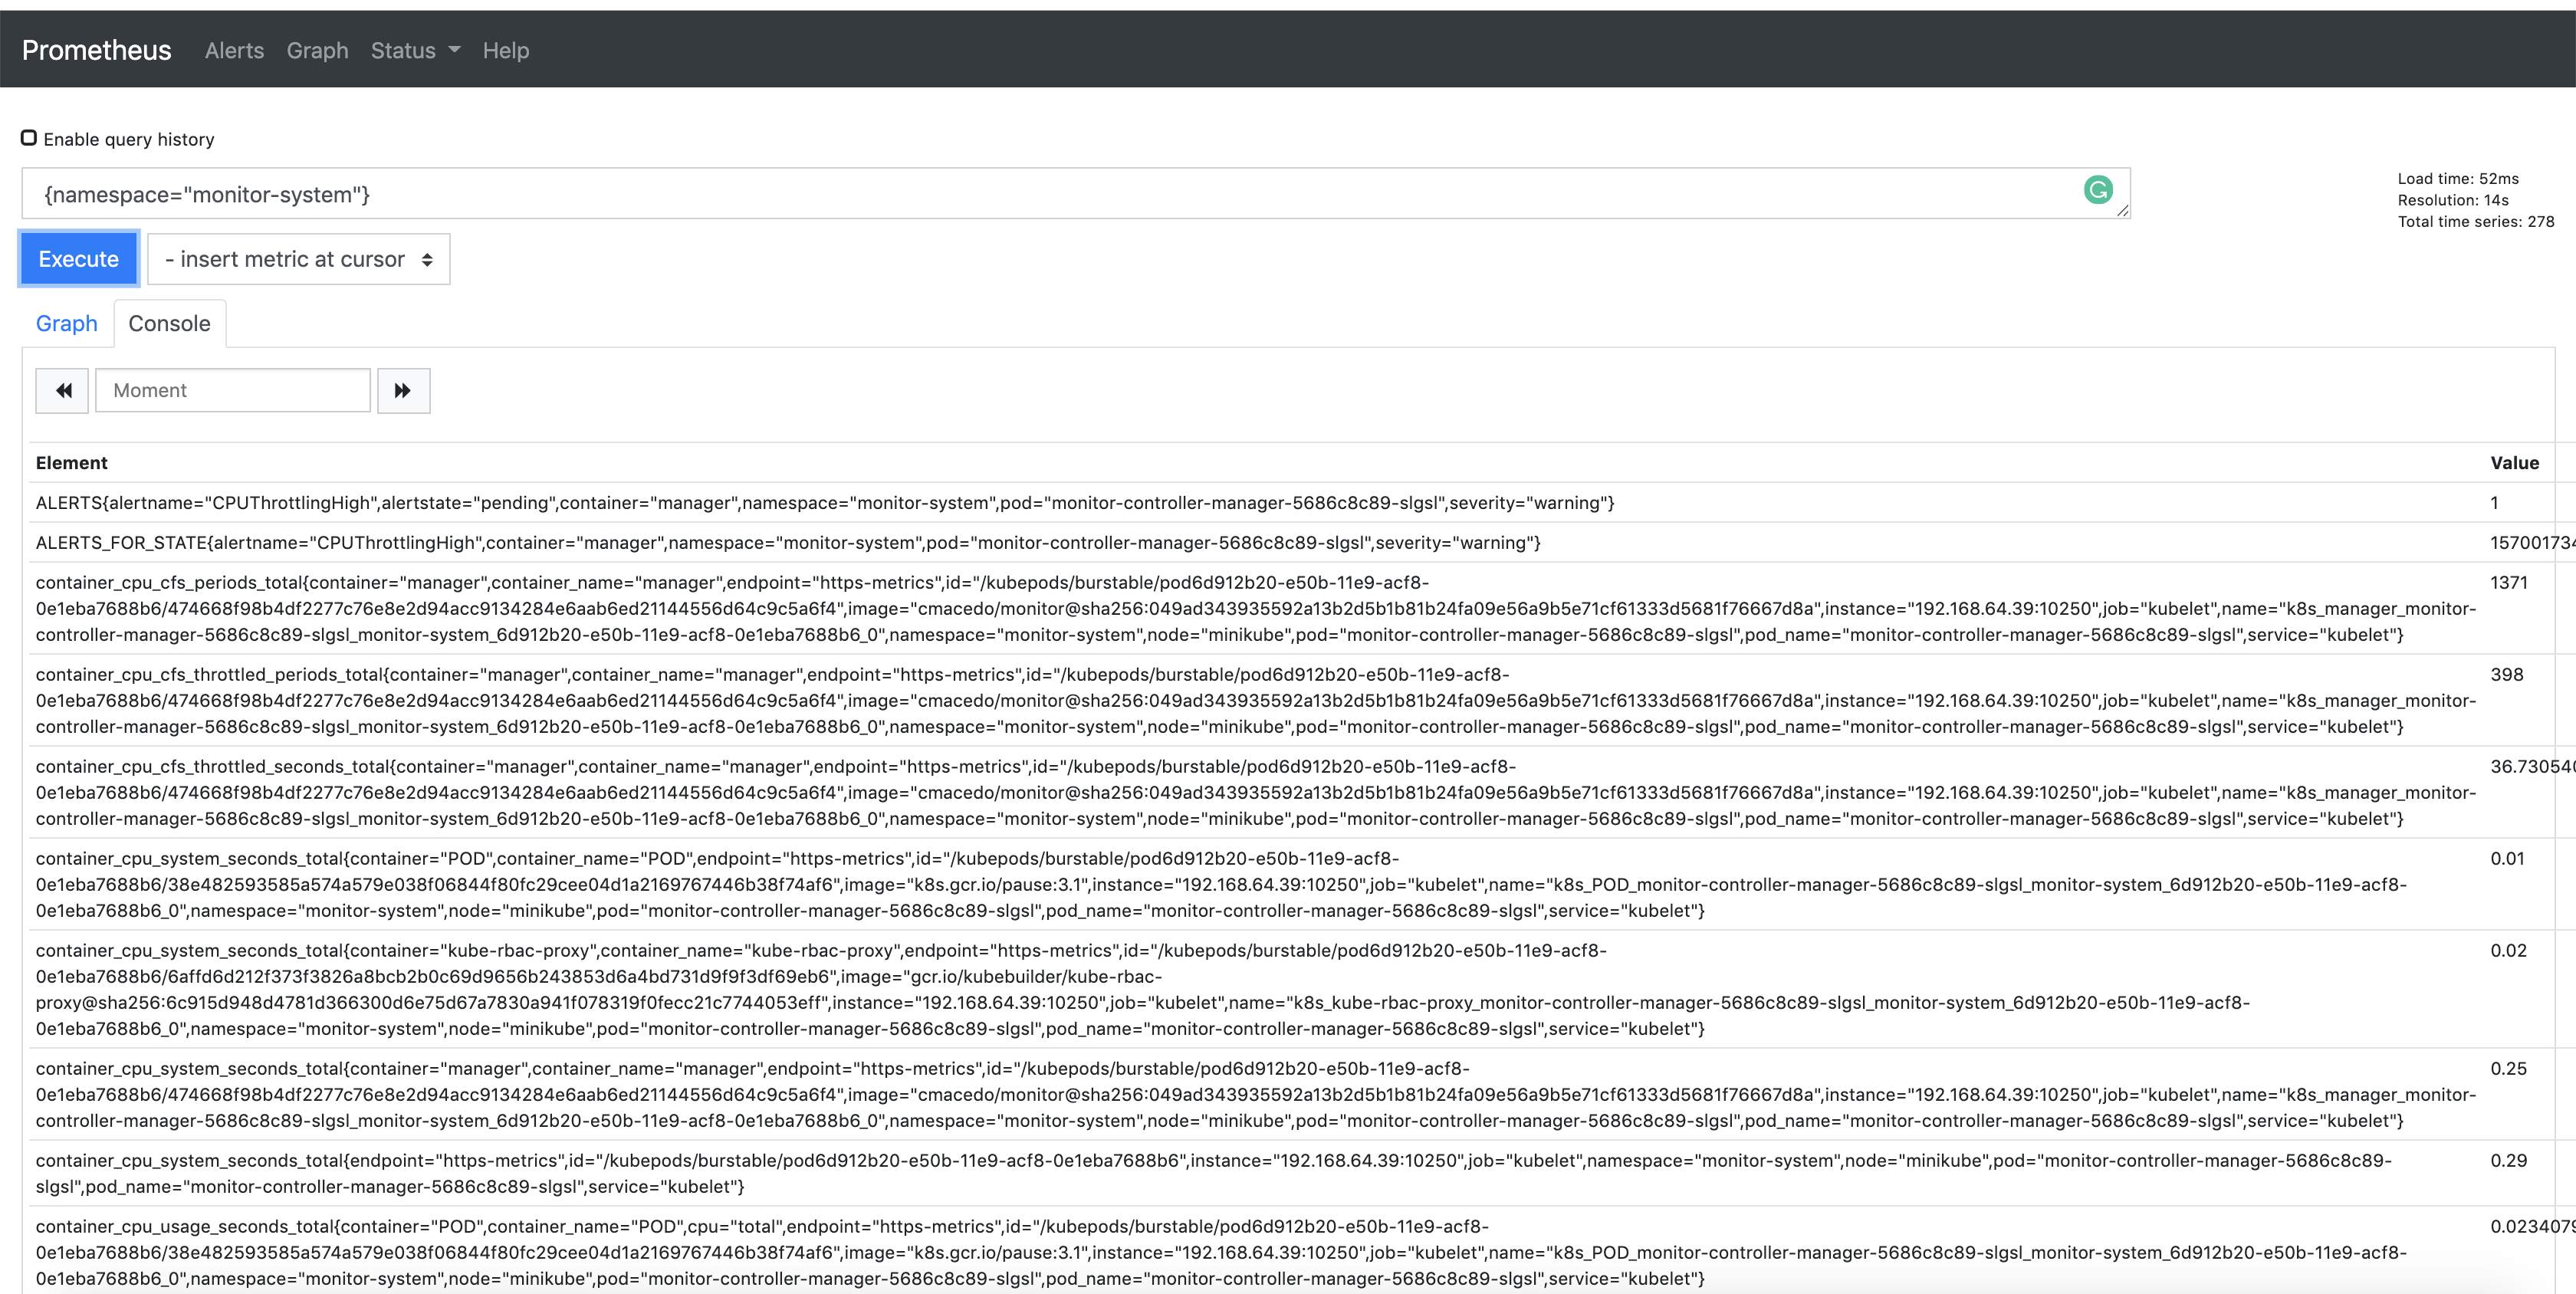
发布额外的指标:
如果你想从你的控制器发布额外的指标,可以通过在 conoller-runtime/pkg/metrics 中使用全局注册的方式来轻松做到。
实现发布额外指标的一种方式是把收集器声明为全局变量,并且使用 init() 来注册。
例如:
import (
    "github.com/prometheus/client_golang/prometheus"
    "sigs.k8s.io/controller-runtime/pkg/metrics"
)

var (
    goobers = prometheus.NewCounter(
        prometheus.CounterOpts{
            Name: "goobers_total",
            Help: "Number of goobers proccessed",
        },
    )
    gooberFailures = prometheus.NewCounter(
        prometheus.CounterOpts{
            Name: "goober_failures_total",
            Help: "Number of failed goobers",
        },
    )
)

func init() {
    // Register custom metrics with the global prometheus registry
    metrics.Registry.MustRegister(goobers, gooberFailures)
}
然后就可以从你的接收循环部分中记录这些指标到收集器中了,并且这些指标就可以被 prometheus 或者其它开放指标系统来抓取了。
将要做的事
如果你正在看这页,很大程度是因为在这本书中还有东西没有完成。前往查看是否有人能发现这个或者向 maintainers 报告 bug。